*This post may contain affiliate links, meaning If you use these links to make a purchase, I may earn a small commission at no cost to you. Thanks.*
Digital stickers are fun ways to spruce up your digital planners and printables. They are easy to create, and you don’t need to be a graphic expert to create them. In this blog post, I’ll show you how to create digital stickers using Canva for free.
I will guide you through the whole process of creating digital stickers to help you add that wow factor to your digital planner/products.
Also, did you know digital stickers are hot on Etsy? Yep, you can create digital stickers using Canva to sell on Etsy in less than two days.
If this sounds like something you are interested in, stick around to learn more!
Also, remember to download your free digital stickers here
What are digital stickers?
Digital stickers are PNG images you can insert into your digital planner or digital file. You can move them around and place them anywhere you please on your digital file, like ordinary paper stickers.
What I love about digital stickers is that you can be as creative as you want. And you don’t have to deal with printing, and sticker paper, which can sometimes be troublesome.
I create digital stickers as add-on features to my digital planners when selling them on Etsy. I usually include them as bonuses and freebies to entice my customers.
If you want to create digital planners, I have a great course to help you create incredible digital planners that customers can’t stop buying!
What are digital stickers used for?
Digital stickers are usually used for digital planners, as you would for a paper planner.
So, this includes making your digital planner:
- More engaging
- More decorative
- More personable,
- To help keep things organised and structured
You can make your digital stickers into sticker sheets or as individual digital sticker files.
What is Canva?
Canva is an easy graphic design software to help you create digital stickers.
Canva is filled with different elements, shapes, fonts, and graphics, making it straightforward to create pretty digital stickers.
The most fantastic thing about Canva is that it has a free version that gives you TONS of different resources, tools, and functions that you can use to make your digital stickers.
I use Canva Pro (paid version) because it fits my needs with creating digital planners/products, and it also has everything included in the free version and more!
I have just for you a 30-day Canva Pro trial to help you get your digital planners or digital stickers to the next level, or you might want to have a play around with it to see what it’s like. Whatever the reason, I would take full advantage of this 30-day Canva Pro trial, as it is for YOU!
How to make digital stickers in Canva for free?
Now we will start getting into the nitty gritty of making digital stickers in Canva.
Here I have answered some essential questions when creating digital stickers in Canva:
1. What size are digital stickers?
If you are creating individual stickers, I recommend a square size of 100x100mm. If you are creating a digital sticker sheet, I recommend US Letter Size (8.5x 11inches).
2. What tools and functions do I need when creating digital stickers in Canva?
When creating digital stickers in Canva, you can use various tools and functions, including lines and shapes, graphics and fonts. Yep, that’s it!
3. Can I use Canva’s digital sticker templates to sell as my own?
You can use Canva’s digital sticker templates. However, if you plan to sell them as your own, you need to modify them and make them different to the original Canva template. I will show you how to do this later in this blog post.
4. How to start creating a digital sticker in Canva?
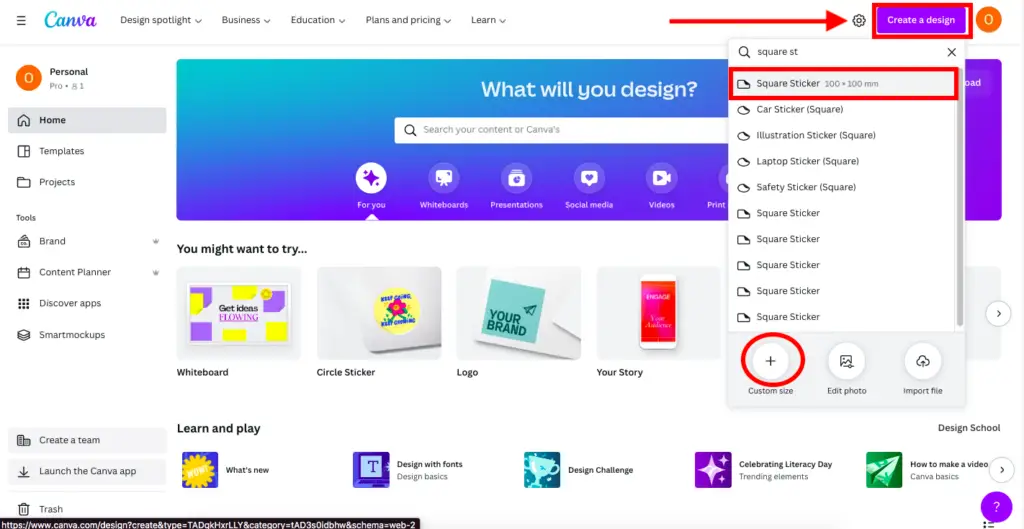
To start creating a design in Canva, you need to click on the ‘Create a design’ tab in the top-right of the Canva homepage. Then you can either search in the search bar for your desired size, ‘Square sticker’, or select ‘Custom size’ if you know the dimension you want for your design.
We are going to be creating three types of digital stickers:
- Bookmark sticker
- To-do list sticker
- Graphic sticker using a Canva template
How to create a bookmark digital sticker?
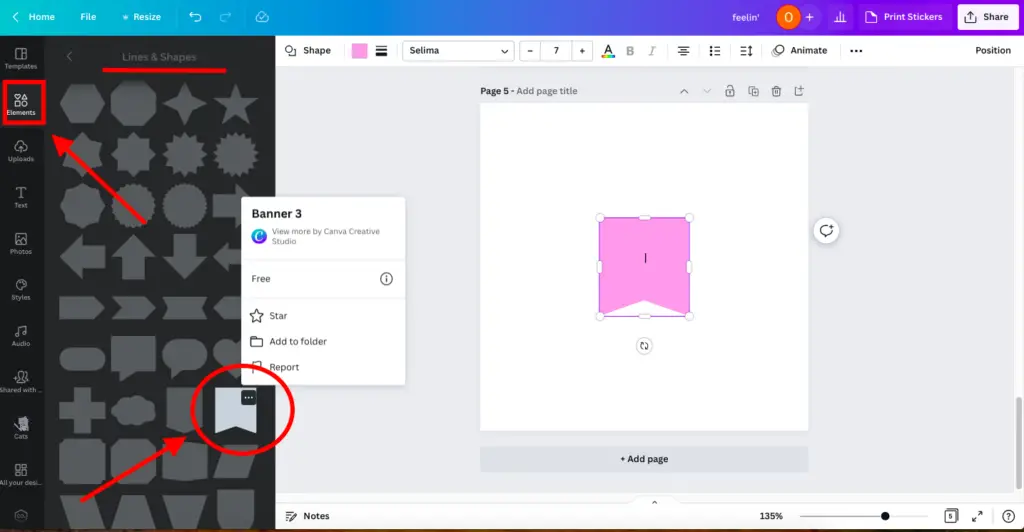
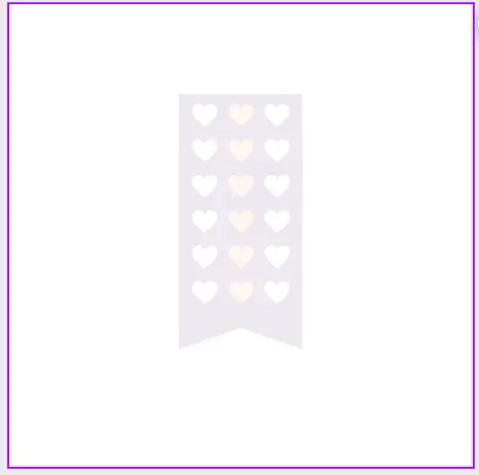
To create a bookmark sticker, you must first select the ‘Elements’ tab on the left and click on lines and shapes. Then select the ‘Banner 3’ shape, as you see below.
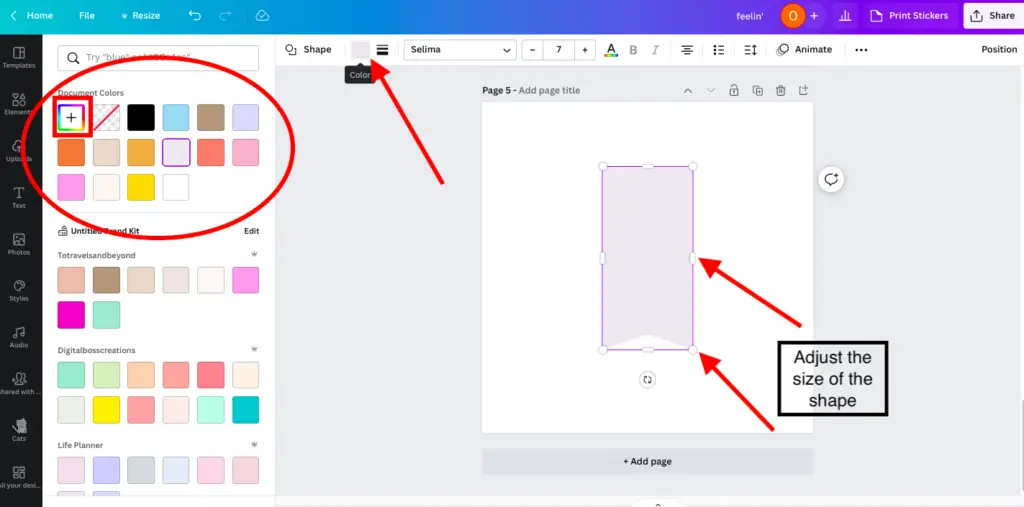
Next, you can change the colour and adjust the size into a bookmark shape.
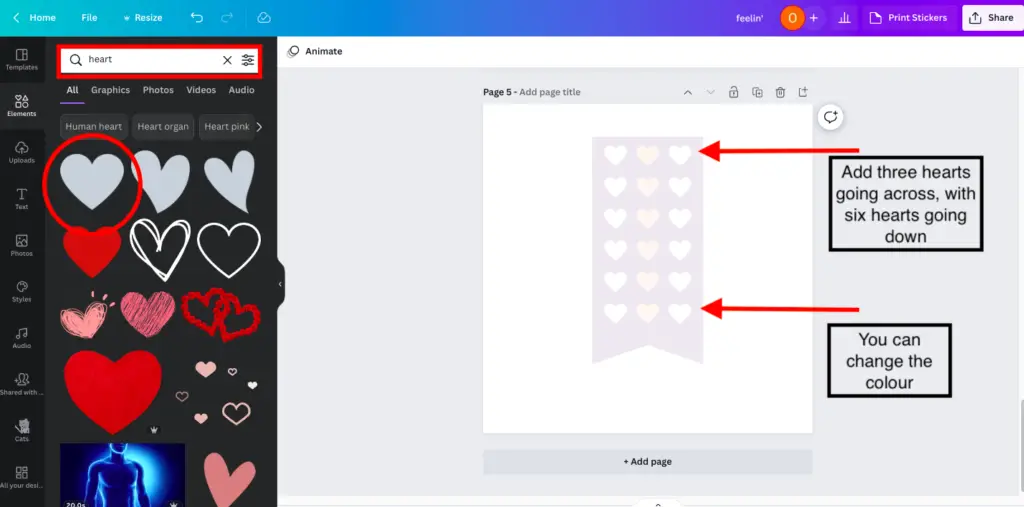
Once you’ve done the above, you can add hearts to your bookmark and make a pattern, like below.
How to create a to-do list digital sticker?
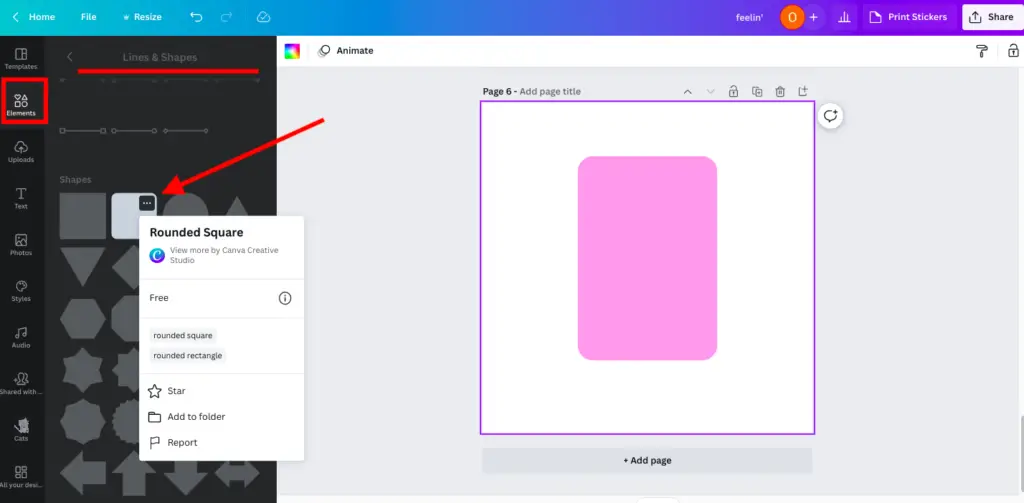
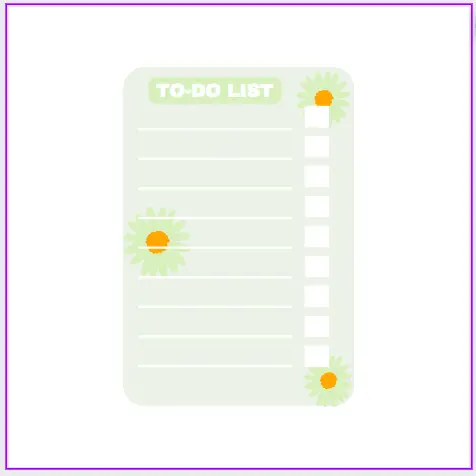
Next, we will be creating a to-do list sticker. First, like above, you need to select ‘Elements’, ‘Lines & Shapes’ and then the ‘Rounded Square‘.
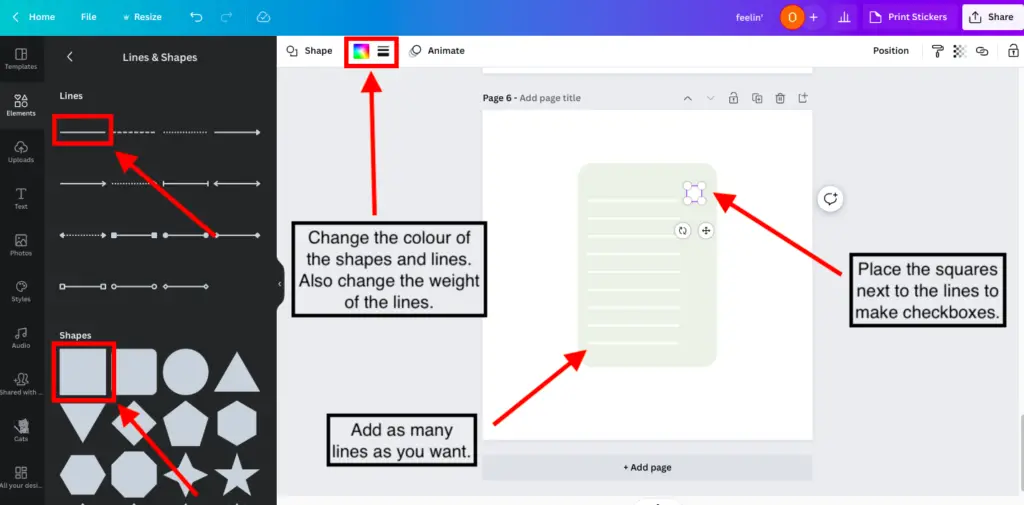
Now that we have our shape, you need to add lines and squares, and you can also change the colour of your elements.
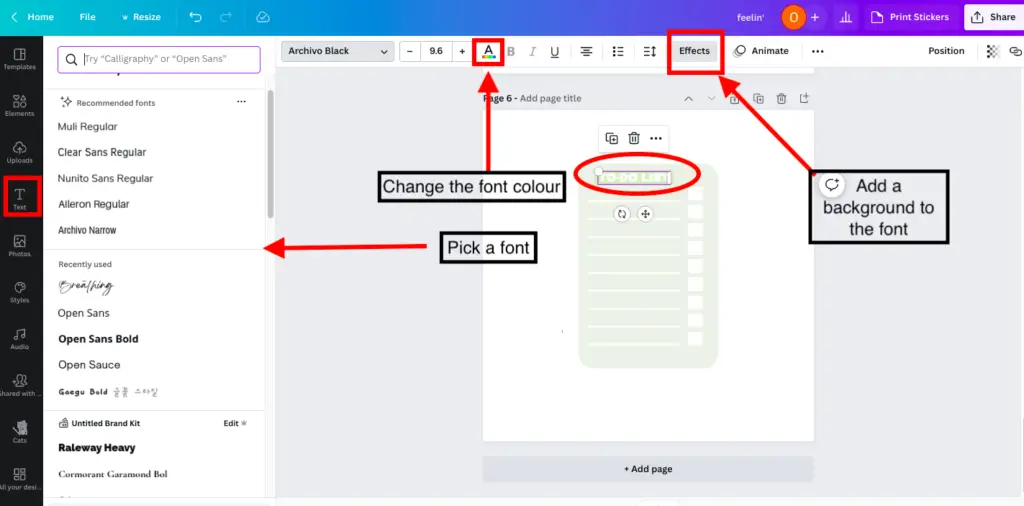
Add text, by selecting the ‘Text’ tab and type in To-do list. You can change the font and add colours and effects as you please!
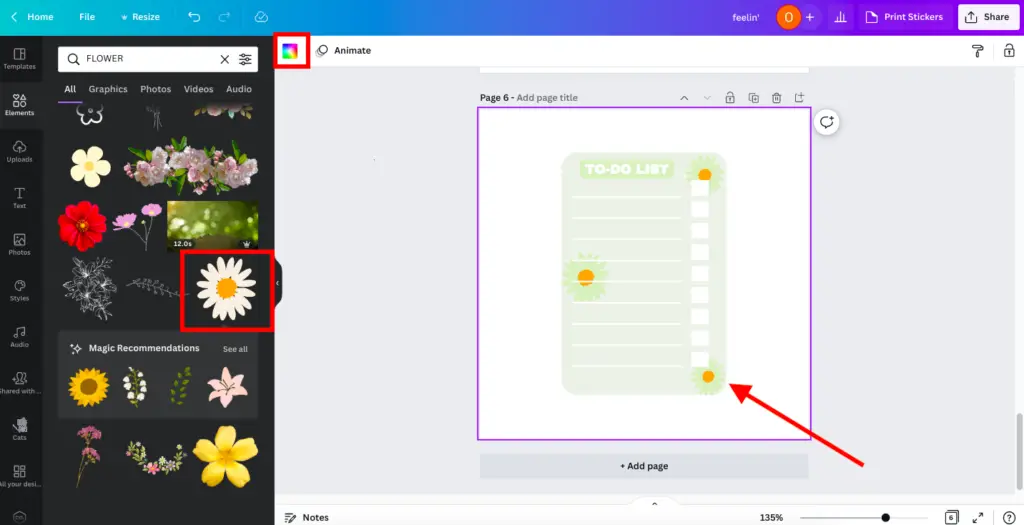
If you want, you could add graphics to your design. See below where I added cute green flowers to the digital sticker design.
How to create a graphic sticker using Canva templates?
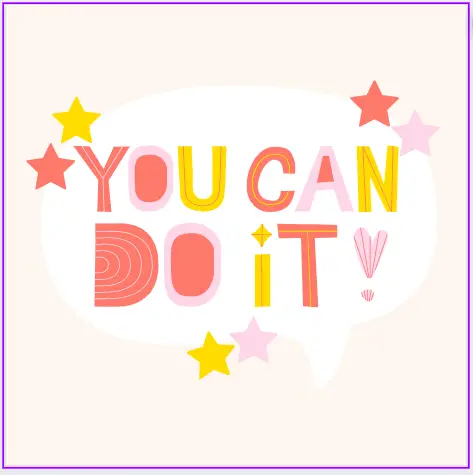
The final digital sticker I will show you how to create is a quote graphic digital sticker using the pre-made templates in Canva. Remember, if you plan on using the templates in Canva, you need to add value to it and make it your own design!
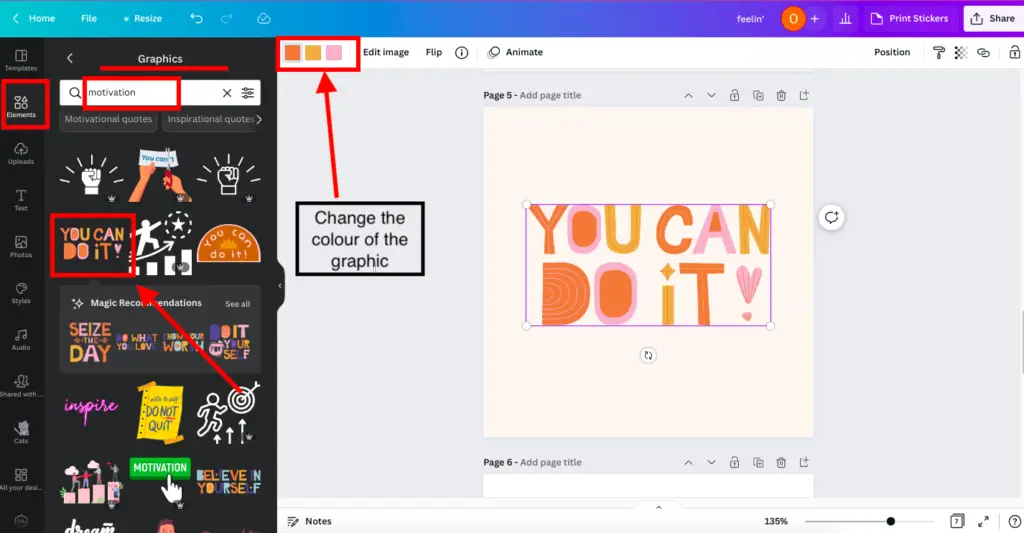
First, I added a graphic motivational quote. Here you can change the colour of the graphic and adjust the size, see below.
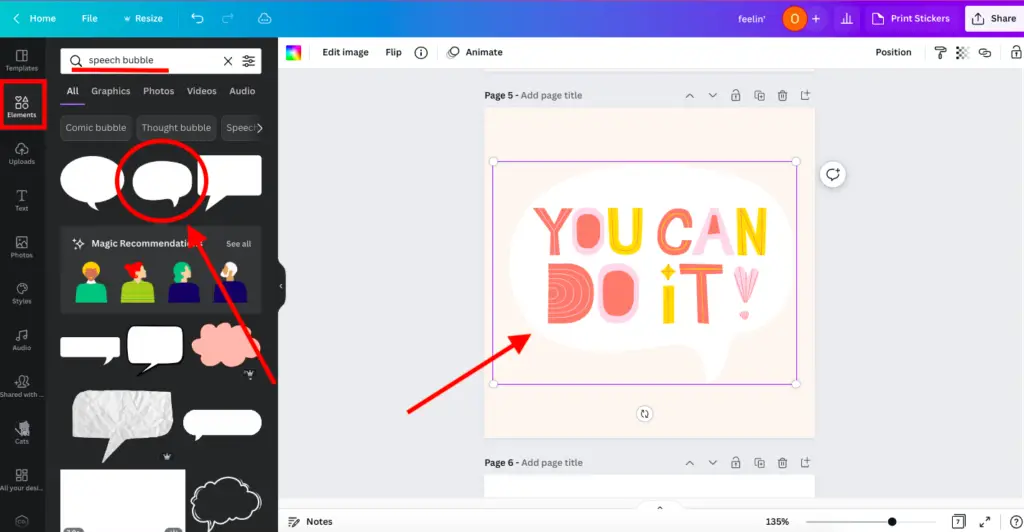
Next, add a speech bubble and place it behind the graphic you can do this by sending the speech bubble to back.
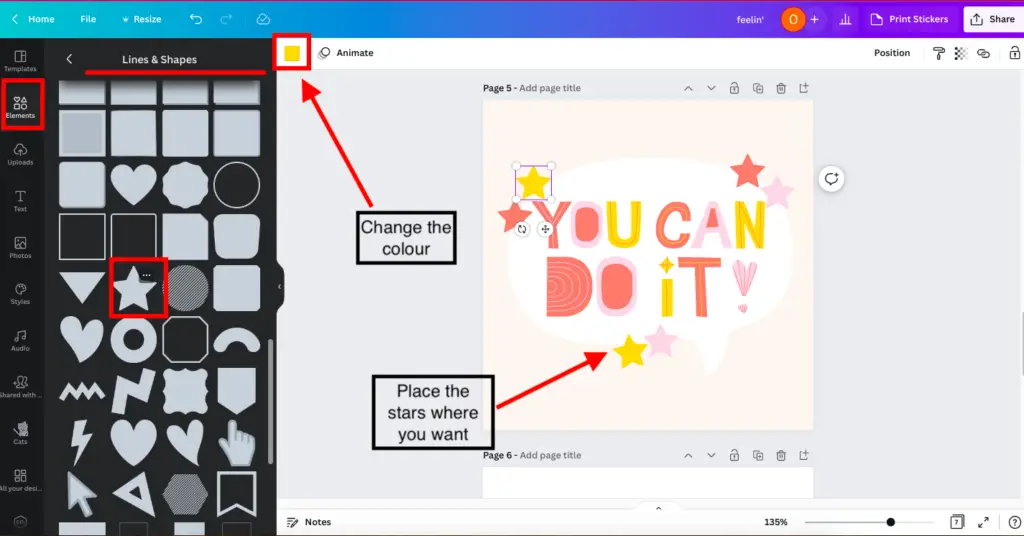
For added value, you can add stars (or other graphics and shapes) to your design, see below.
Here are the final results of the three digital stickers we created!
How to download digital stickers?
Select ‘Share’ and then ‘Download‘ to download digital stickers. Once you’ve selected download, you must select ‘PNG’ as the file type. Also, you must select ‘Transparent background’ (Only with Canva Pro) as this ensures that the background won’t be visible.
How to edit these digital stickers in Canva?
Download and edit these three digital sticker templates on Canva to help you create digital stickers for free.
All you need to do is click here, enter your email address, and you’ll be sent a Canva template link. Make sure you’ve signed in, or if you don’t have a Canva account, sign up here (it’s free to do).
Once you’ve signed in, you’ll be able to upload the three digital sticker templates, and you’re free to modify to however you please. And you can also use them to sell on Etsy or other platforms.
Frequently asked questions
How do I create a digital sticker in Canva?
To create a digital sticker in Canva, you can use Canva’s free digital sticker templates and modify it however you please. Or you can create your digital sticker from scratch by using the shapes, lines, and graphics in Canva.
Can you make sticker designs on Canva?
You can do any sticker design on Canva; there are no limitations. You can make sticker designs on Canva by using their graphics, fonts, and elements. Some sticker designs you could create on Canva include bookmarks, washi tape, labels, motivational quotes, mini to-do lists, and more.
Can you use Canva to make stickers to sell?
One of the best things about Canva is that it allows you to create stickers to sell. However, you CANNOT copy the stickers – you must add value and make them your own if you intend to sell them.
How can I make my own digital stickers?
The best platform to make your own digital stickers is Canva. Canva provides you with all the tools necessary to create digital stickers. This includes custom sizes, different graphics and fonts, shapes, and effects.
Final Thoughts: How to make digital stickers using Canva for free
Okay, there you go!
We have created three digital stickers using Canva for free.
And I bet I know what you’re thinking “Olivia, that wasn’t too hard!”
Creating digital stickers using Canva is soooo simple to do! It’s a mixture of shapes, text, lines, and graphics that must be manipulated to create unique digital stickers.
You can create digital stickers to sell, or you could use them as a lead magnet to attract attention to your digital product.
For me, adding digital stickers as a freebie is a great way to get additional engagement with my digital planners.
If you want to start creating digital planners to sell on Etsy, remember to check out my Create Digital Planners Like A Boss Babe Course.
I can’t wait to see all your designs!
Let me know if you have any questions in the comment section below
And remember….
Use my link and sign up to start your 30-day free Canva Pro trial now!
You May Also Love:
- How to create a digital planner to sell using Canva like a boss
- Canva Free vs Canva Pro: Which one is worth it?
- How to create pretty digital planner covers using Canva for free
- 10 helpful Canva tips and tricks to make designing much easier
Tools To Use To Help Build Your Digital Planner Empire:
- Try Canva Pro free for 30 days
- Get 30-days free Skillshare access
- Visit my PLR Canva Template Shop
- Download amazing graphics and fonts with Creative Fabrica and Creative Market
- A helpful guide to opening an Etsy store
- Get your 40 free Etsy listings
- My Etsy shop (for digital planners and printables) use the Promo code: THANKYOU22 for a 5% discount on all purchases.
- Learn how to create incredible digital planners to sell on Etsy with the Create Digital Planners Like A Boss Babe Course
Hi Olivia – I’ve tried I make my own sticker, and I’ve saved them as a PNG but it doesn’t work when I try to use it on GoodNotes. The crop tool only gives me the option to take a screenshot. Help!
Hi Hanna, thanks for your message. Once you’ve downloaded your digital stickers to your iPad/tablet, they are usually saved to your photo album. To add your digital stickers to goodnotes, click the photo symbol on the top ribbon and from there, it will open your photo gallery (if you haven’t already, you may need to allow Goodnotes access to your photo album), and you’ll be able to select your digital stickers. And remember to access the photo symbol to ensure that the edit mode is on – this is the pencil with the line cross-out symbol on the right-hand side in Goodnotes.
I hope this helps! If you have any more questions, email me at olivia@digitalbosscreations.com – happy to answer any more questions or walk you through the steps.