You have this amazing new digital planner you want to use immediately. However, you’ve watched countless YouTube videos and google searched until your fingertips have gone numb, but you still don’t understand how to upload your digital planner to Goodnotes.
That’s why I’m here!
I will show you an easy step-by-step tutorial on how to upload your digital planner to Goodnotes the easy way.
Uploading a digital planner to Goodnotes is a straightforward process, and by the end of this blog post, you’ll be a pro at uploading your digital planners to Goodnotes.
How to upload your digital planner to Goodnotes
Here’s a step-by-step guide to help you through it
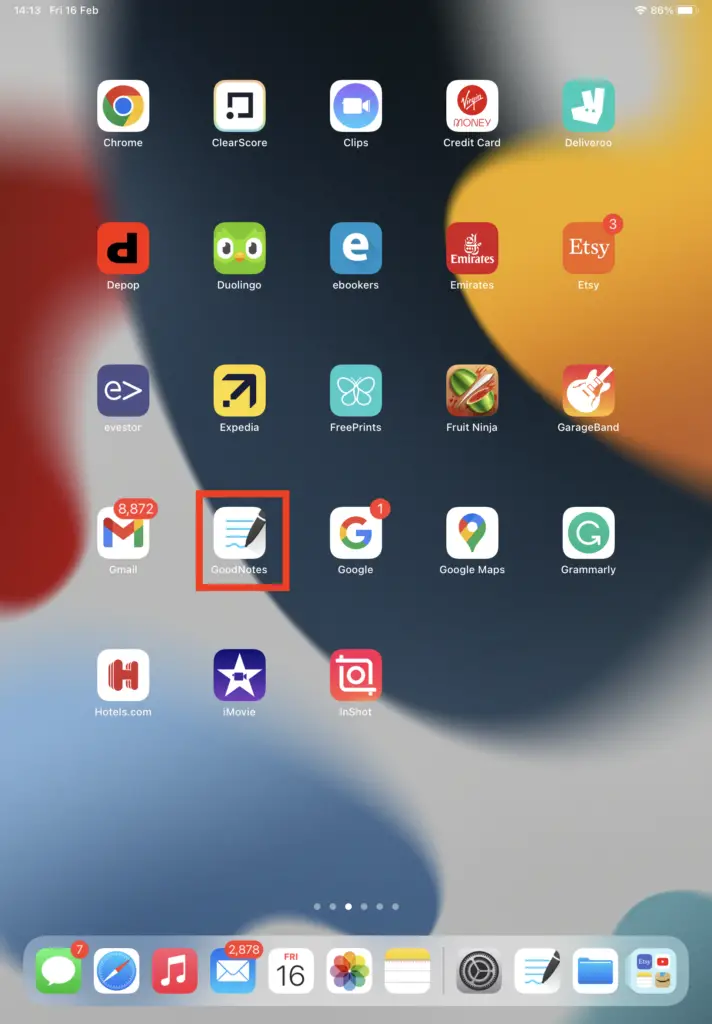
1. Open GoodNotes App
First, ensure your device has installed the Goodnotes app. Open the app to start the process.
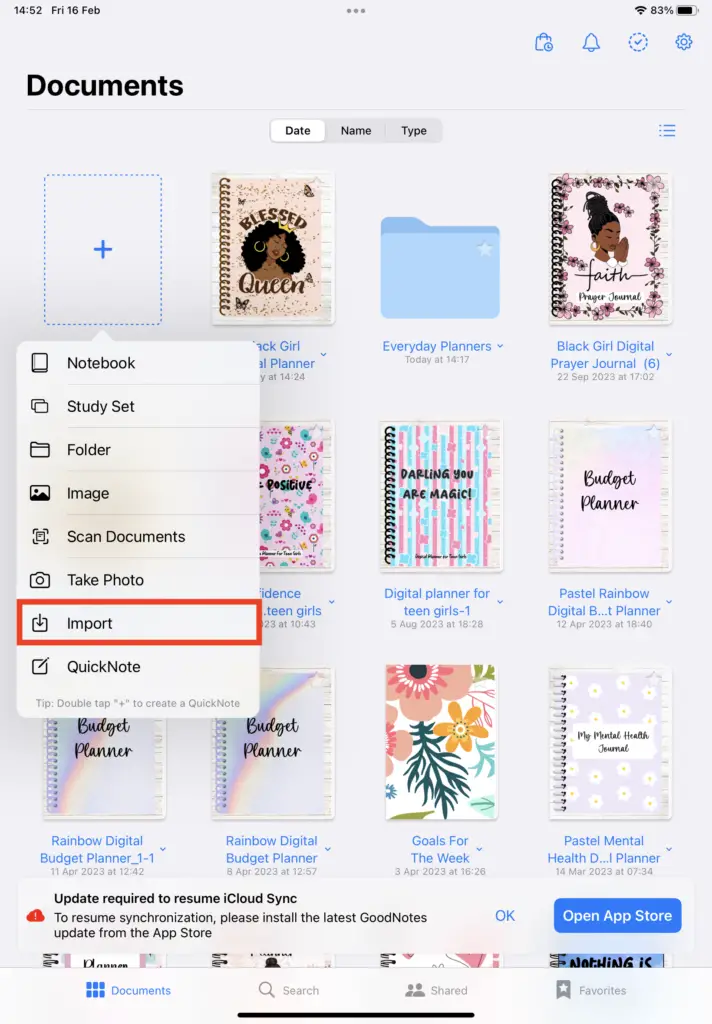
2. Import Your Digital Planner File
- Tap the “+” or “New” button to create a new notebook within the Goodnotes app.
- Select “Import” from the options provided.
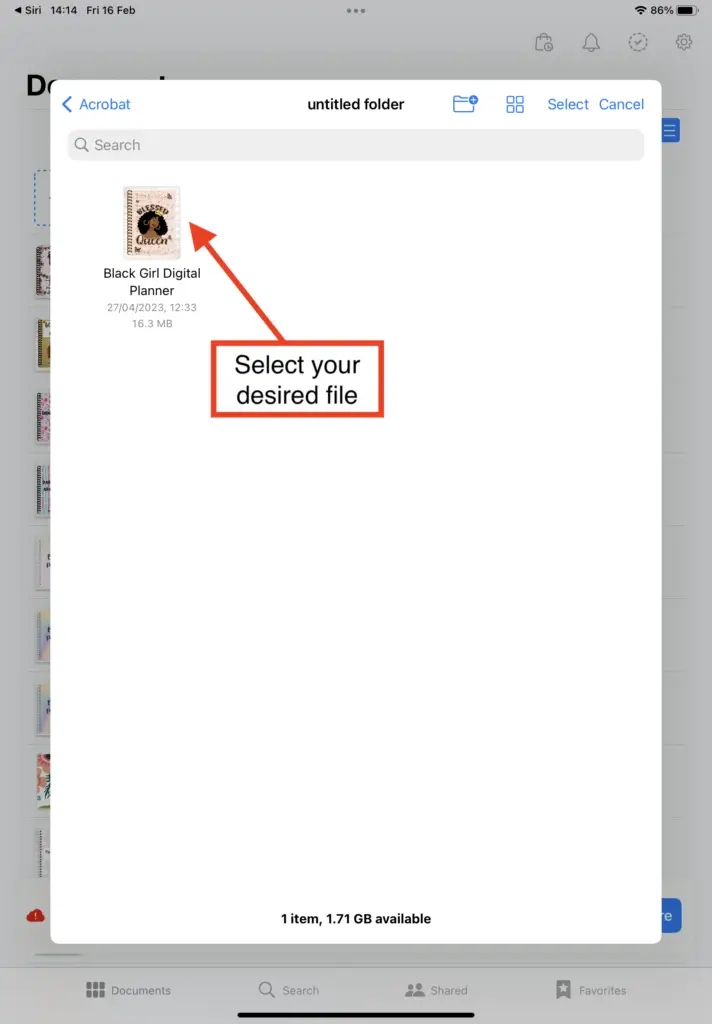
Navigate to the location where your digital planner file is stored. This could be in your device’s storage, iCloud, Dropbox, Google Drive, or any other cloud storage service you use.
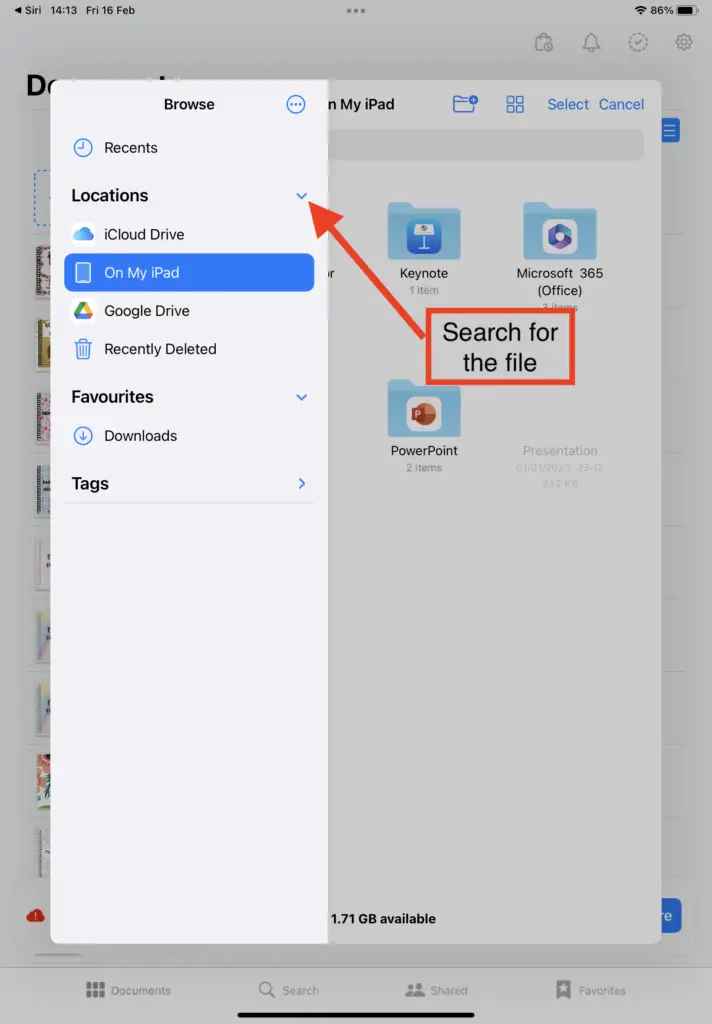
Select the digital planner file you want to upload to Goodnotes and tap “Import.”
3. Choose Import Options
- Goodnotes will prompt you with import options. Choose the appropriate settings based on your preferences. For example, you can select the page orientation, whether you want to import all pages or just specific ones, and other relevant settings.
- Once you’ve selected your preferences, proceed by tapping “Import.”
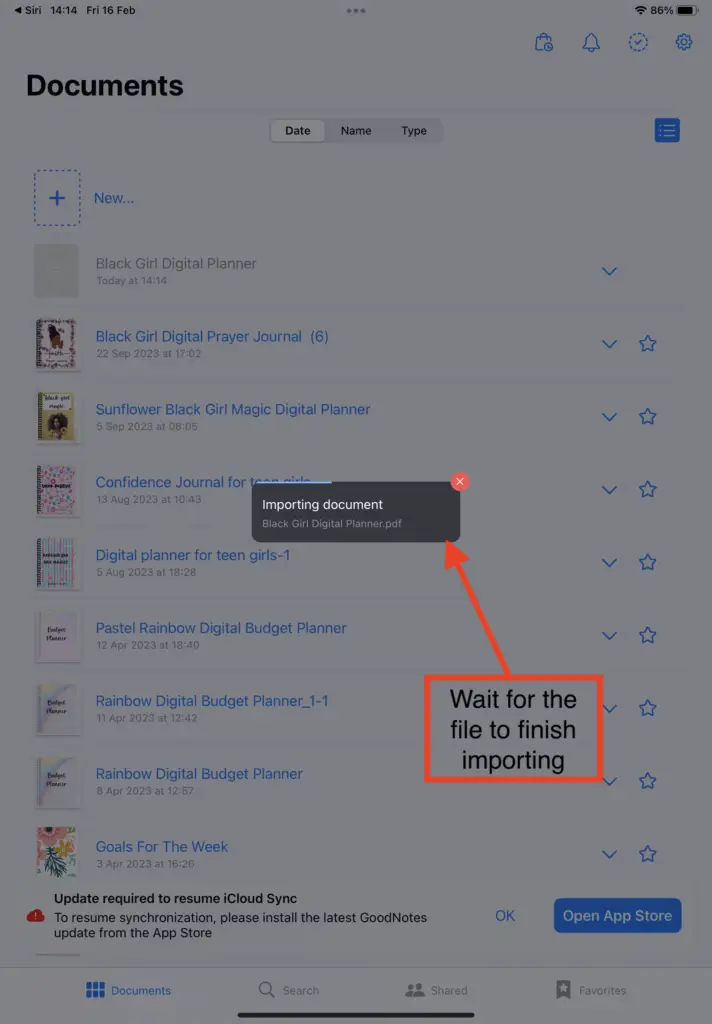
4. Wait for Import to Complete
Depending on your digital planner file size, importing all the pages into Goodnotes may take a moment. Be patient and wait for the import process to complete.
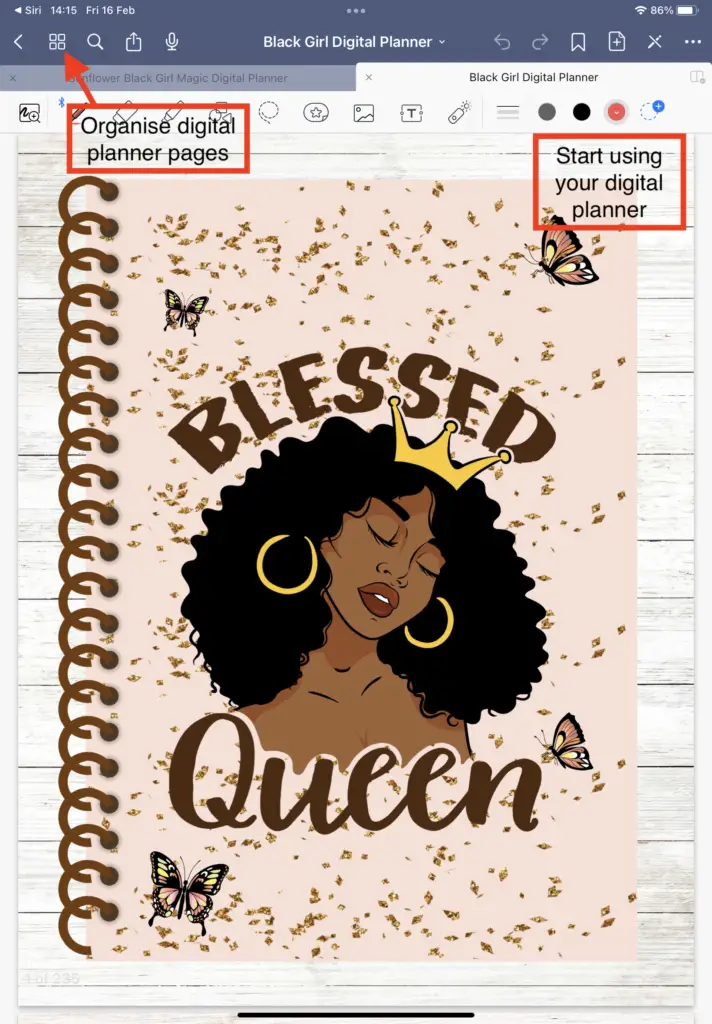
5. Access Your Digital Planner
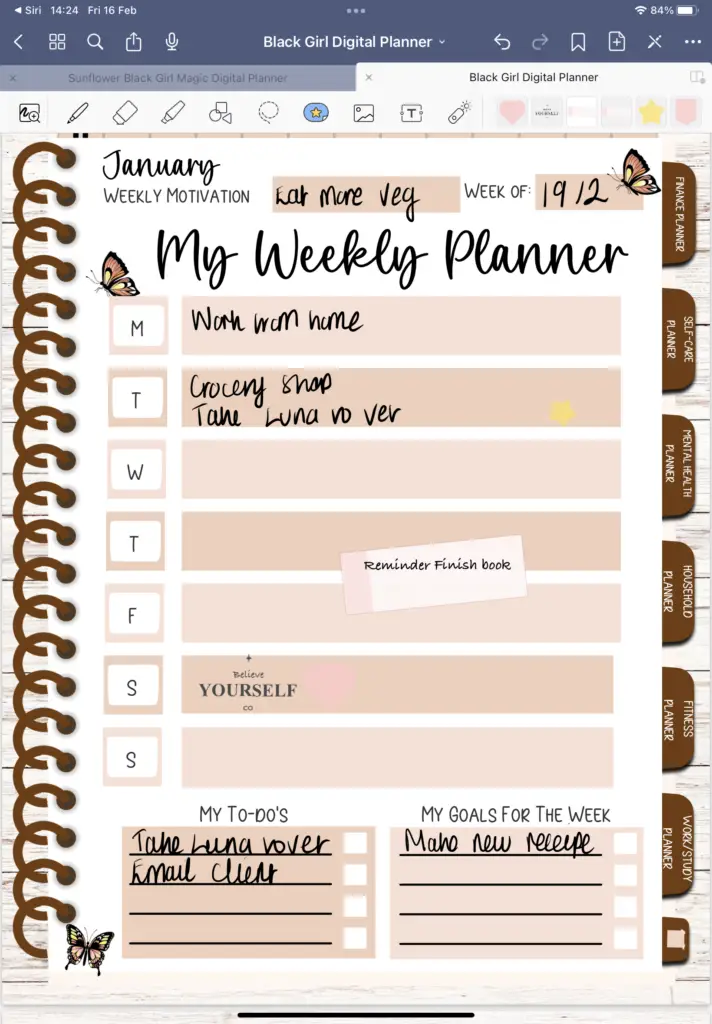
Once the import process is finished, you’ll find your digital planner in your notebooks in the Goodnotes app. Tap on the notebook to open it and start using your digital planner.

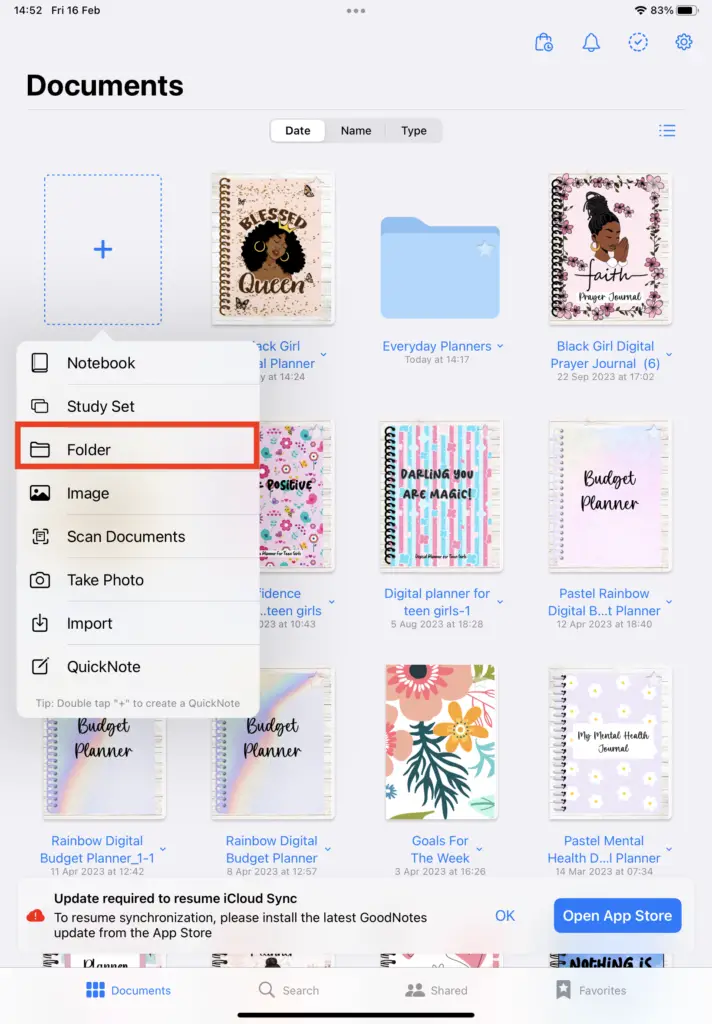
6. Optional: Organize Your Digital Planner
Goodnotes allows you to organise your notebooks into folders for easier access and management. You can create folders and move your digital planner into them to tidy your workspace.
To create a folder, tap the “Edit” button within the notebook view, then tap “New Folder.” Give your folder a name and drag your digital planner into it.
7. Start Using Your Digital Planner
You’re all set! You can now start using your digital planner within the Goodnotes app. Navigate through the pages using the page navigation tools, add text, annotate, draw, or use any other features available in Goodnotes to customise and interact with your planner.
Final Thoughts: How to upload your digital planner to Goodnotes the easy way
That’s it! You’ve successfully uploaded your digital planner to Goodnotes and are ready to boost your productivity with digital planning tools.
I hope you have found this blog post useful.
Let me know if you have any questions in the comment section below.
You May Also Love:
- The Pros and Cons of Selling Digital Products on Etsy in 2024: Is It Still Profitable?
- 10 Profitable Digital Planners To Sell On Etsy that nobody knows about! (part two)
- How to make a digital planner with hyperlinks using Canva for free
- How to sell digital planners on Etsy and make passive income fast
Tools To Use To Help Build Your Digital Planner Empire:
- Try Canva Pro free for 30 days
- Get 30-days free Skillshare access
- Visit my PLR Canva Template Shop
- Download amazing graphics and fonts with Creative Fabrica and Creative Market
- A helpful guide to opening an Etsy store
- Get your 40 free Etsy listings
- My Etsy shop (for digital planners and printables) use the Promo code: THANKYOU22 for a 5% discount on all purchases.
- Learn how to create incredible digital planners to sell on Etsy with the Create Digital Planners Like A Boss Babe Course