Canva is amazing. However, I know the feeling of being overwhelmed and confused when you are new to Canva. That’s why I’m to present you with( drum roll) 10 helpful Canva tips and tricks to make designing much easier.
But first……
What is Canva?
Canva is a graphic design platform for creating posters, presentations, social media graphics, documents, etc.
I’m by no means a very creative person- to be honest, my drawing skills stop at stick figure designs, I know, so embarrassing.
Canva has allowed me to tap into that inner creativity that I never knew I had.
And now, I can confidently say I’m somewhat a wiz at designing graphics, planners and social media designs.
Don’t worry; trust me, you’ll feel the same way too!
Is Canva Free?
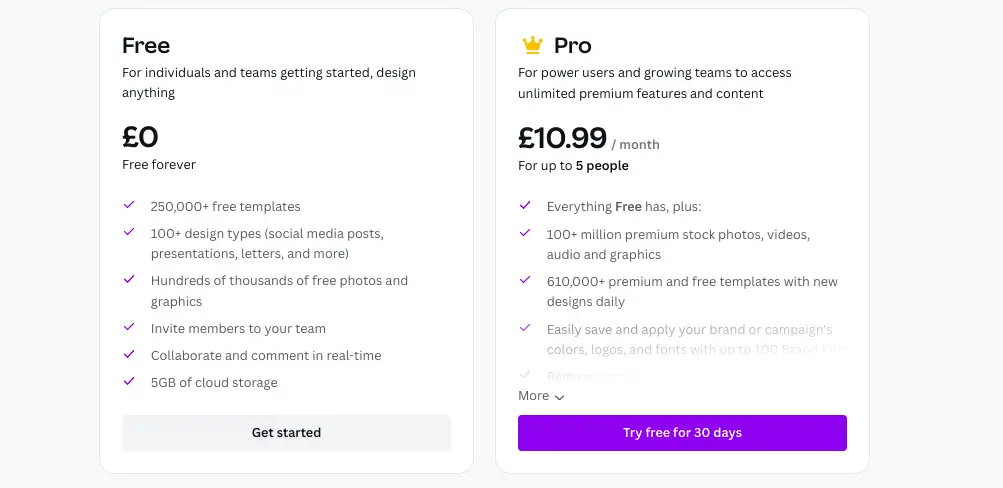
Canva currently has three plans:
Free plan: This allows you access to all the tools to start your design journey.
Pro plan: Everything is free, with access to premium tools.
Enterprise Plan: Everything included in pro. However, it is more tailored to scaling your business brand and content.

Okay, now we have got that out of the way here are….
10 helpful Canva tips and tricks to make designing much easier

*This post may contain affiliate links, meaning If you use these links to make a purchase, I may earn a small commission at no cost to you. Thanks.*
1. Canva: The Resizing Tool
The resizing tool lets you resize your design to any size. This means that you can make a design in one size and then, for example, can have multiple different sizes of the same design with just one click.
2. Canva: The Lock Tool
Next is the Lock tool. This tool allows you to lock your design in place. This is an excellent tool if you want to keep all your elements in place and you want to share your design with others without them moving the elements.
3. Canva: The Tidy-Up Tool
This is one of my favourite tools! As someone who makes many planners, I use multiple different shapes/lines that often need to be aligned. However, the magnificent tidy-up tool does the alignment for me.
4. Canva: The Background Remover Tool
Remember those days when you had to use photoshop or another photo editing software to remove the background of a photo. Well, let me tell you that those days are now over. The background remover tool instantly removes the background of any photo!
5. Canva: The Smartmockups Tool
Another perfect tool is smart mockups. With smart mockups, you can easily embed your design into a mockup without adjusting the image multiple times and resizing and rotating another a few times ( don’t worry, I’ve been there). Instead, smart mockups do it for you automatically, and there are a lot of mockups to choose from.
6. Canva: The Animate Tool
Are you tired of your presentations, videos, Pinterest pins, and other design formats being boring and lacking lustre? The animate tool can bring your design back to life! There are many photos/ word animations to choose from to ensure that your design remains appealing and fun.
7. Canva: The Word Effects Tool
Transform your text into something more appealing and engaging. The word effect tool allows you, for instance, to curve, make shadows, add a background, and more to your text.
8. Canva: The Styles Tool
Use the styles tool to transform your design into something more eye-catching when in doubt. There is a variety of different styles to choose from. I advise playing around with the styles tool to find the perfect style for you and your design.
9. Canva: The Grids Tool
The grids tool is such as wicked tool. You have many grids style options to transform your photos into a collage or an engaging piece of work.
10. Canva: The Frames Tool
Last but certainly not least is the frames tool. This tool is in the elements tab and gives you many different frames for your photos. For example, it has a laptop, circles, and diamond frames, which allows you to insert any image you want into the frames.
10 helpful Canva tips and tricks: Final Thoughts
Concluding thoughts…. Canva is brilliant, err mmm.. Canva is amazing!
No, really, Canva is truly great. It has a lot of functions that allow you to bring your design to the next level.
This blog post only scratched the surface of Canva’s capabilities.
I hope you have found this post helpful, and as a result, you now have some cool new Canva skills!
Also, keep your eye out for part two of helpful Canva Tips and Tricks.
And remember…
In the comment selection below, let me know if you found this blog post helpful and also if you know any neat Canva tools that weren’t mentioned in this blog post.
You May Also Love:
- The top 10 profitable digital planners to sell on Etsy and make passive income
- Canva Free vs Canva Pro: Which one is worth it?
- How to create a digital planner to sell using Canva like a boss
Additionally, if you are looking for some free resources, check out my freebies page!
Can I upload a digital planner design on Canvas & sell on Etsy without any modification?
Hi Timi,
Thank you for your message. If you want to use Canva’s planner templates then, yep, you’ll have to modify it and make it your own before you sell it on Etsy. But if it’s your design that you created on Canva then that’s should be acceptable to sell on Etsy too. I hope that helps