Do you want to learn how to create seamless patterns in Canva for free, but something is holding you back?
You’re probably telling yourself that you are not a graphic designer, so how can you create seamless patterns? Or yeah, right, you can’t create seamless patterns in Canva for free.
Well, what if I tell you that you’re wrong?
Yep!!
Because you don’t need to be a graphic designer to create seamless patterns; yes, you can create patterns in Canva for free.
This blog post will show you an easy tutorial on creating seamless patterns in Canva within a few easy steps.
By the end of this post, you’ll have mastered the skills in creating simple, easy-to-do patterns.
Don’t forget to grab your free Canva digital pattern paper!
What is Canva?
First things first, what is Canva?
Canva is an incredible graphic design platform that can help you create many designs, including:
- Social media posts
- Invitations
- Posters
- CV’s
- Presentations
- Websites
- Printables
- Digital planners
Canva is easy to use and specifically tailored to complete beginners. With user-friendly tools and resources to help you create your perfect design(s)
Yep! You don’t need to be a graphic designer to use Canva.
And the best thing about Canva is that it’s extremely affordable compared to other graphic design platforms for which you would need a lot of training.
Heck! You don’t need to pay for Canva, as they have a free version.
How to Create seamless patterns in Canva?
*This post may contain affiliate links, meaning If you use these links to make a purchase, I may earn a small commission at no cost to you. Thanks.*
1. Select desired graphic(s)
To create seamless patterns in Canva, select the graphics you want.
I recommend using between 1-3 different graphics that work well together.
Canva has many free graphics to choose from.
However, you can also outsource and buy your graphics from Creative Fabrica or Creative Market to give you something different from Canva graphics.
2. Symmetrical vs Asymmetrical
When creating patterns, you must consider whether you want to create a symmetrical or asymmetrical pattern.
A symmetrical pattern is when you create a pattern in a mirror image. This is the most common way to create patterns.
If you draw a line in the middle on a piece of paper, draw half a square on one side of the line and the other half on the other. By doing this, you’ll notice that you’re creating a mirror image/ reflection of the shape.
Whereas asymmetrical designing is the opposite, and it’s when you create a pattern that is not a mirror image.
Again, if you draw a line in the middle on a piece of paper, and one side draw a shape, and on the other side of the line, draw the same shape but in a different placement to the shape on the other side of the line. Here, you’ll notice that you’re not creating a mirror image but an asymmetrical pattern.
Take a look at the image below to help you understand.


3. Placing your graphics on your blank canvas
Once you’ve completed the above steps, the next thing to do is arrange the placement of your graphics.
What I like to do is, have a play around with the placement of the graphics to find the desired pattern I like.
If you find this part difficult, don’t worry!
Google and Pinterest can save the day!
Have a little scope on Google and Pinterest to generate inspiration and ideas.
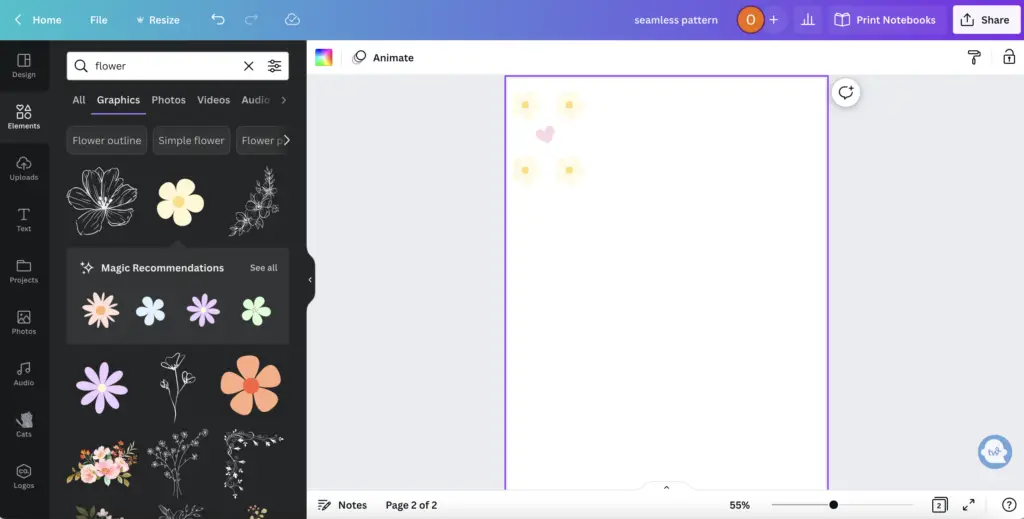
Take a look at the image below, where I’ve created a simple starter pattern.
5. Duplicate and group your pattern
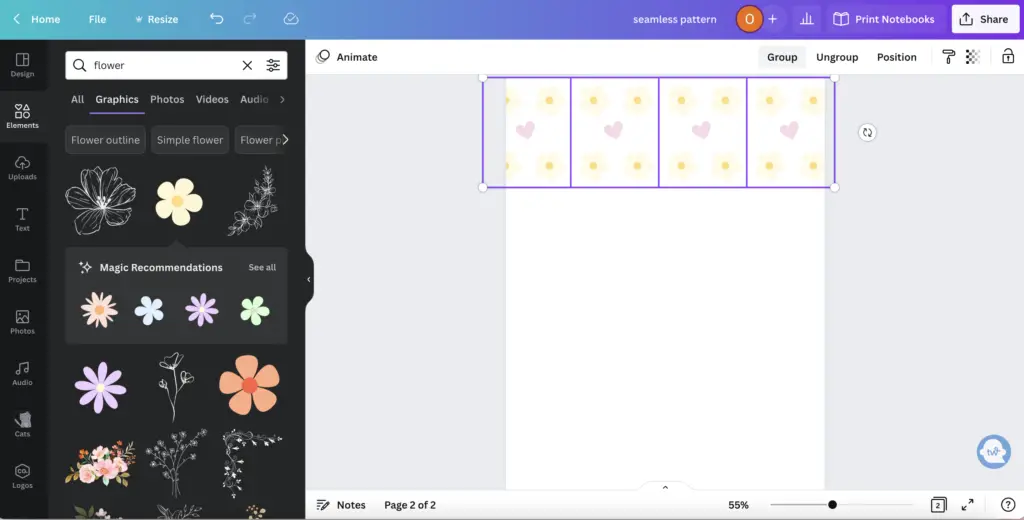
Now that you have your desired pattern, the next step is to duplicate it, and you can do this by highlighting your pattern, then right-clicking and selecting Duplicate.
After you’ve duplicated your desired pattern as many times as you wish, highlight the pattern and select Group (which is on the top ribbon)
6. Duplicate your pattern to create a seamless design
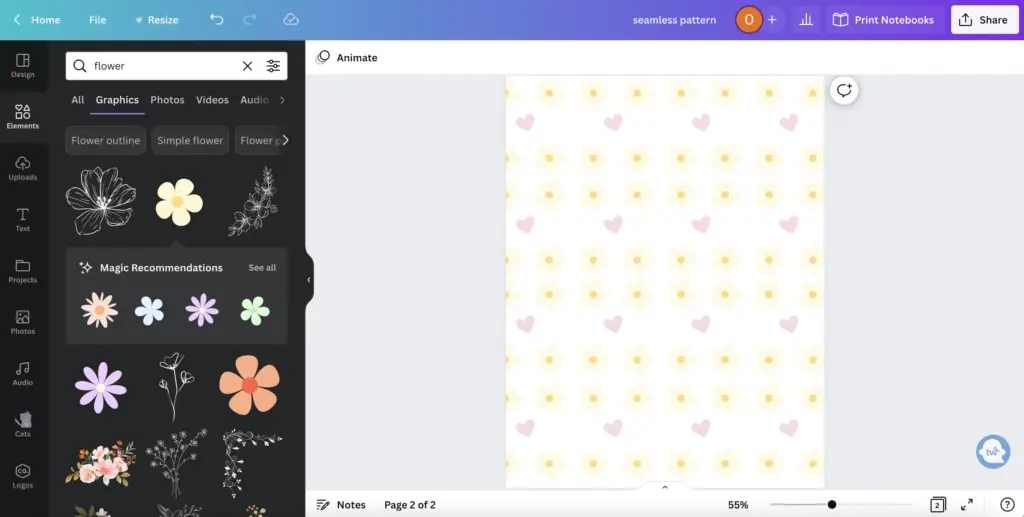
So, now that you have your first stretch of a pattern, this is where the fun begins!
You can duplicate your pattern as many times as you want.
Also, you can flip or rotate your pattern to see what works well for you.
Get fun and creative with it!
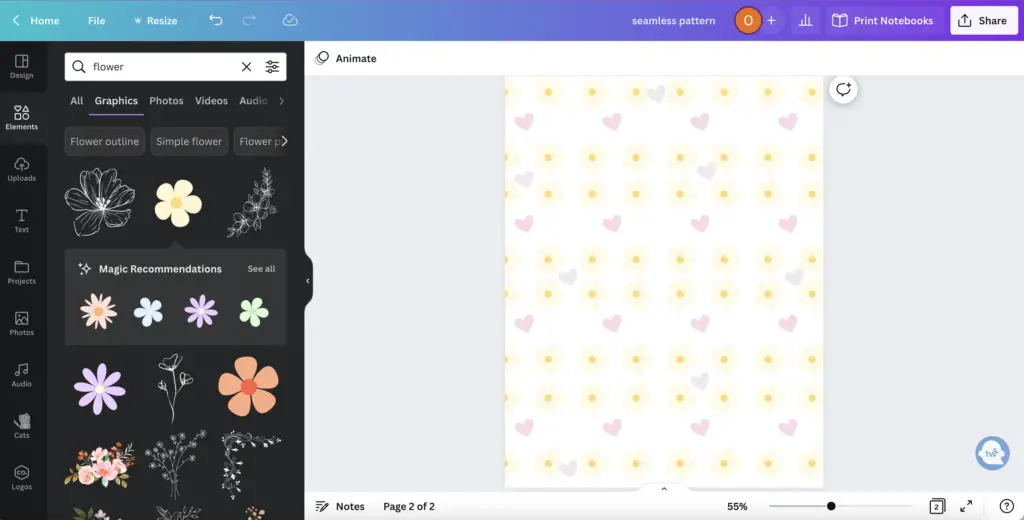
7. Add your finishing touches
Last but not least, add extra finishing touches to your pattern.
You can add a new graphic or change the colour in certain aspects of your pattern.
As you see below, I added a purple heart to give it some extra flavour, lol
Final Thoughts: create seamless patterns in Canva for free
And that’s it!
That was the how to create seamless patterns in Canva for free tutorial.
See, that wasn’t too hard!
I know that after this tutorial and with a lot of practice, you’ll become a graphic designer pro!
Remember to use my Canva Pro 30-day free trial link to help you become that graphic designer wiz who can create incredible seamless patterns.
And don’t forget to grab your free Canva digital pattern paper!
Let me know if you have any comments or questions in the comments section below, and also, don’t forget to share this blog post if you enjoyed it.
You May Also Love:
- How to create a digital planner to sell using Canva like a boss
- Canva Free vs Canva Pro: Which one is worth it?
- How to create pretty digital planner covers using Canva for free
- How to Create Digital Planners Using Canva Tips and Techniques
Tools To Use To Help Build Your Digital Planner Empire:
- Try Canva Pro free for 30 days
- Get 30-days free Skillshare access
- Visit my PLR Canva Template Shop
- Download amazing graphics and fonts with Creative Fabrica and Creative Market
- A helpful guide to opening an Etsy store
- Get your 40 free Etsy listings
- My Etsy shop (for digital planners and printables) use the Promo code: THANKYOU22 for a 5% discount on all purchases.
- Learn how to create incredible digital planners to sell on Etsy with the Create Digital Planners Like A Boss Babe Course