Are you super excited about the prospect of creating digital planners and selling them on Etsy?
But there’s one little thing holding you back.
You’re figuring out where to start when creating digital planners.
“ I’m not a graphic designer. How am I going to create digital planners with no experience.”
I often get readers like you asking me how to:
- Create digital planners
- Add planner tabs and links
- Use Canva to create planner pages
So, to help you get started in your digital planner journey, I’ll guide you on creating digital planners using Canva tips and techniques.
By the end of this blog post, you’ll have all the necessary knowledge and feel confident in creating digital planners using Canva.
*Access the How to Create Digital Planners Using Canva Tips and Techniques course now!!!!*
What is Canva
If you are new to the digital product creation field, then your probably thinking, what is Canva?
Canva is an ingenious graphic design platform that can help you create social media posts, posters, invitations, planner inserts, presentations, videos, digital planners, and more.
You can use Canva even if you are a complete beginner! Canva is super straightforward to use and has all the resources and tools to help you create fabulously professional-looking designs, even as a beginner.
I cannot stress enough how much Canva has helped me grow my digital planner biz; it has given me the confidence to unleash the design abilities I never knew existed.
If you want to try out Canva now and unleash your design potential, I have a free 30-day Canva Pro trial. Check out how amazing Canva is for yourself!
*This post may contain affiliate links, meaning If you use these links to make a purchase, I may earn a small commission at no cost to you. Thanks.*
How to Create Digital Planners Using Canva Tips and Techniques
Okay, so let’s get straight into it…
Creating a digital planner using Canva comprises many steps and tools.
The main thing you need to know about creating a digital planner is that it often uses elements such as shapes, fonts, graphics, and colours (yep, that’s it!)
And the main features you need to create within your digital are a planner cover and planner pages.
In the following blog post sections, I’ll explain how to create a digital planner cover and planner pages using Canva.
Then I’ll delve into how you can use secret Canva tips and tricks to help you design when creating a digital planner.
If you want, you can create your digital planner concurrently with this blog post to help you get all the techniques and info you need.
How to create a digital planner cover using Canva tips and techniques
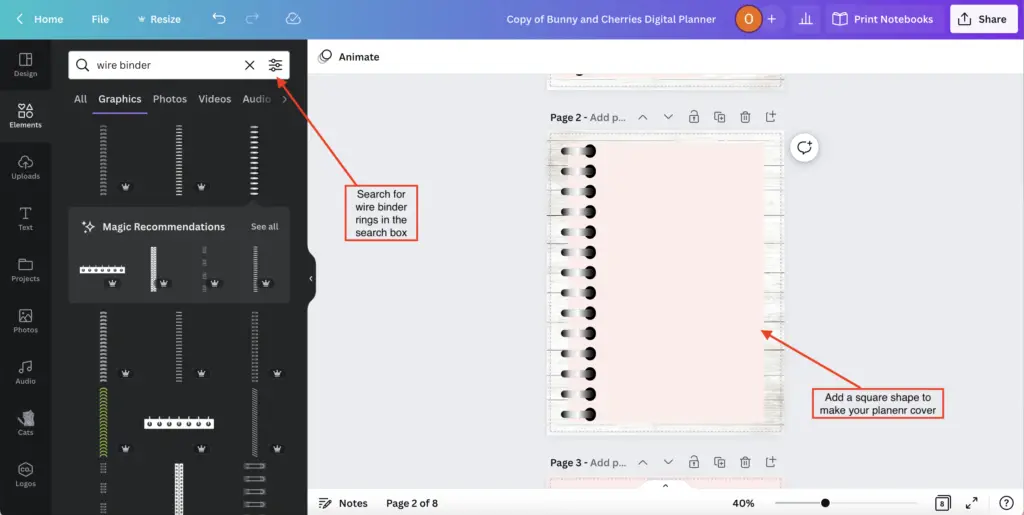
To create a digital planner cover, we first need to add a background to make the digital planner look realistic.

Next, add a cover page ( a square shape) with a binder ring from the elements tab.
After, add your graphics and text to create your perfect planner cover.
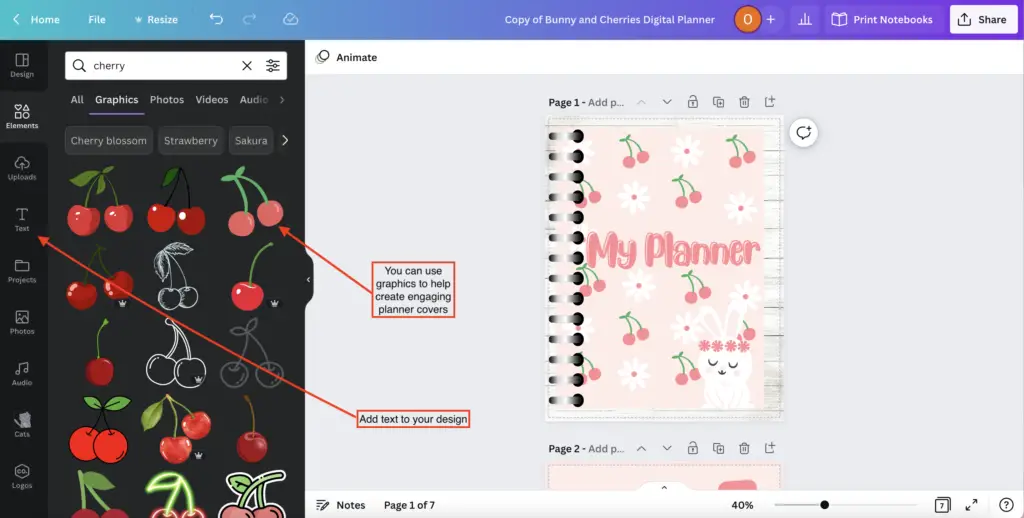
Quick tip: You can also outsource your graphics or planner cover background from online graphic marketplaces, such as Creative Fabrica, Creative Market, and Etsy. If you’re going to sell your digital planners, you need to ensure that the graphics you use have a commercial license.
How to design planner pages using Canva tips and techniques
You can create all different types of planner pages.
Here are some ideas:
- Daily planner
- Weekly planner
- Calendar
- Self-care routine
- Habit tracker
- Grocery list
- Income tracker
- Worksheets
- Daily beauty routine
- Checklists & trackers
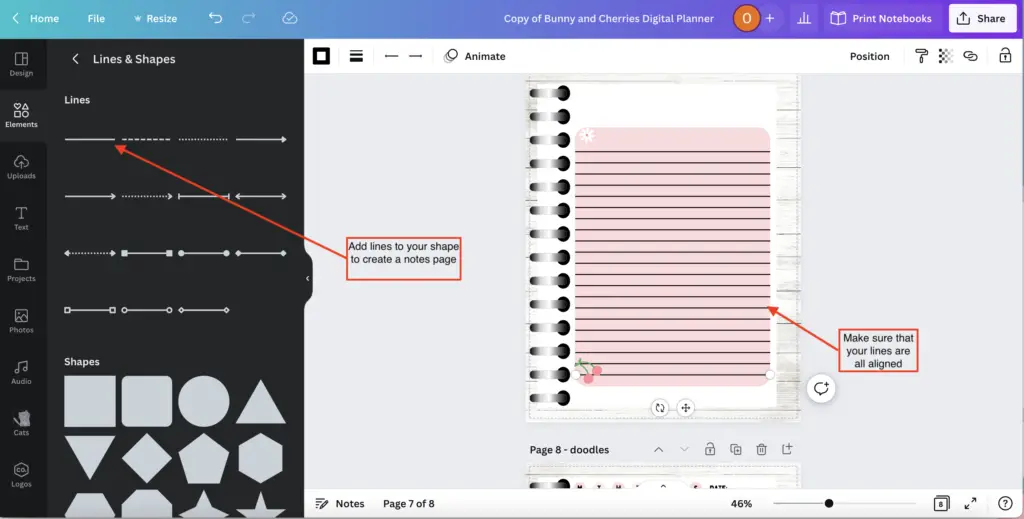
Below I’ll show you a quick tutorial on creating a notes planner page.
To create a notes planner page, first, select a square shape.
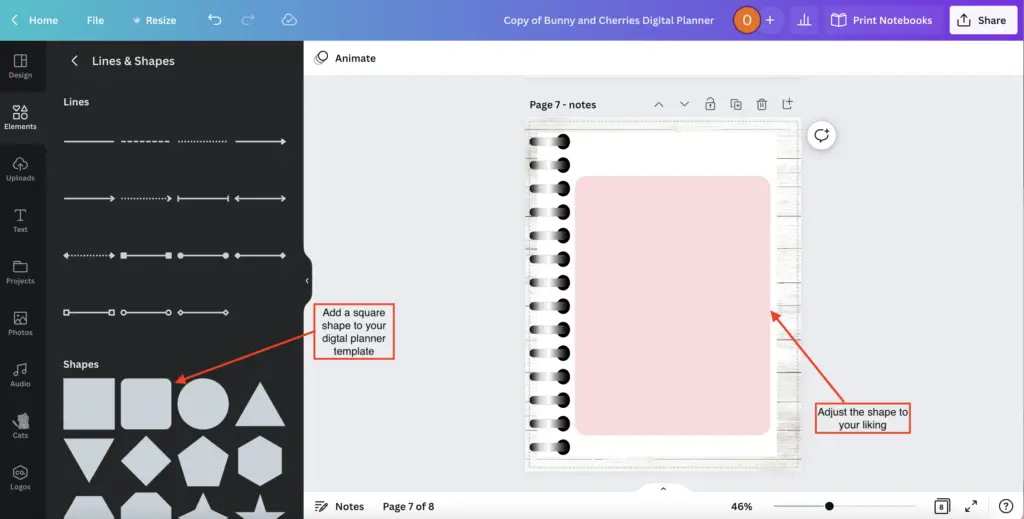
Next, add a line to your shape and duplicate them to form a notes page. Once you’re finished, you can add the finishing touches, like graphics and a date (make it your own!).
Canva tips and techniques to use when designing digital planners
Here are a few Canva design techniques and tools you can use when creating your digital planner.
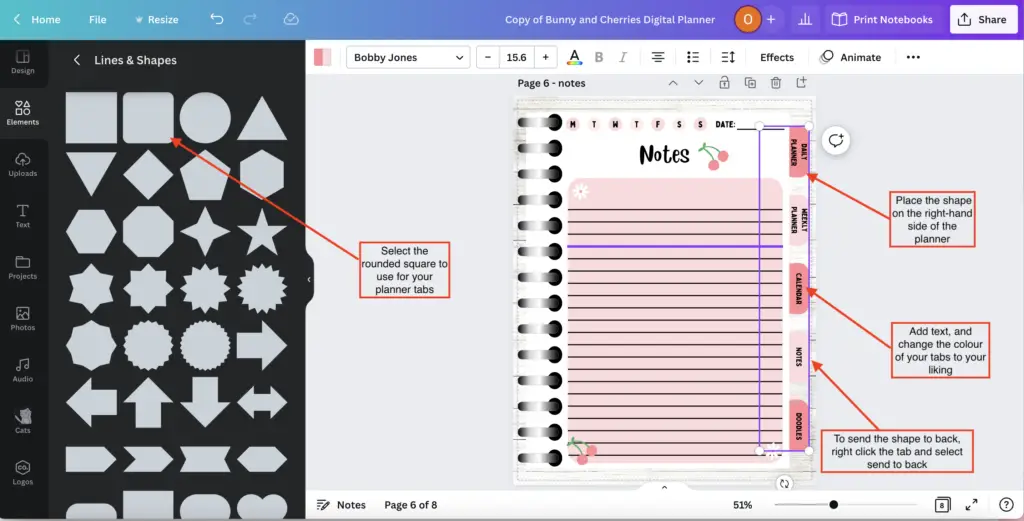
Creating digital planner tabs using Canva
To add planner tabs to your digital planner, select the ‘rounded shape’ and place the shape on the right-hand side of the planner page.
You may need to send the shape ‘to back’ so it’s behind the planner page. To do this, right-click the shape and select send to back from the drop-down list.
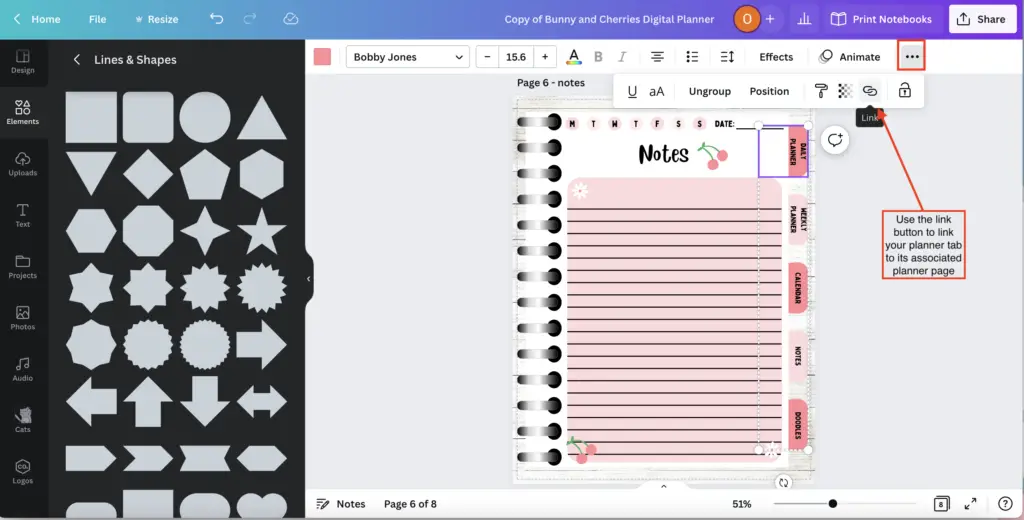
Linking planner pages using Canva
To link the tabs to the planner page, select the planner tab and on the top ribbon, select the three dots; there, you’ll see the link button.
Once you select the link item, you’ll be able to link your planner page to the associated tab.
For example, the daily planner tab will link to the daily planner page.
Quick tip: Make sure you name your pages to help you quickly search for your pages to link to your tabs.
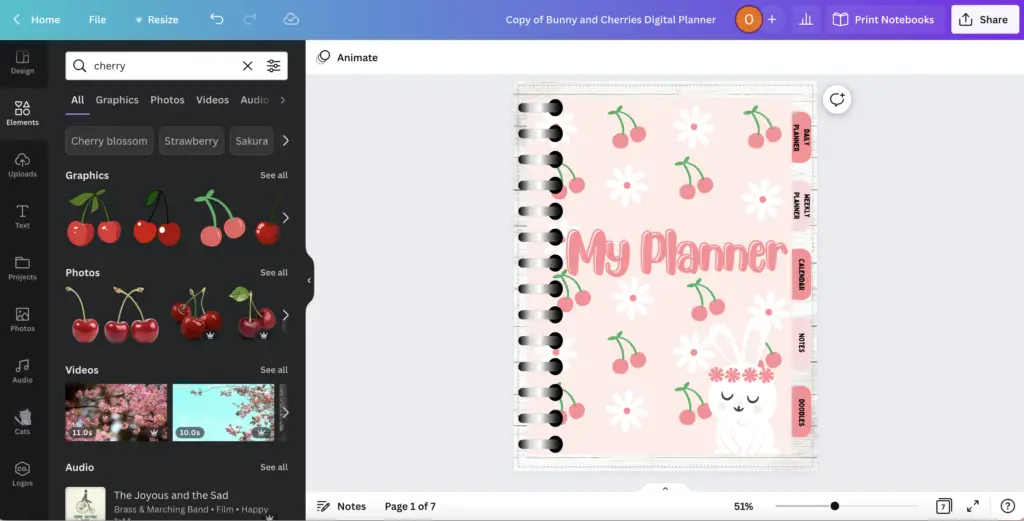
Creating patterns using Canva
Using Canva to create patterns is not as daunting as it may seem!
My general rule is to grab one or two graphics/shapes and start playing around with them to make a pretty pattern.
With the bunny planner example, I used a simple cherry and a flower, played around with and came up with a simple design. Have a look below.
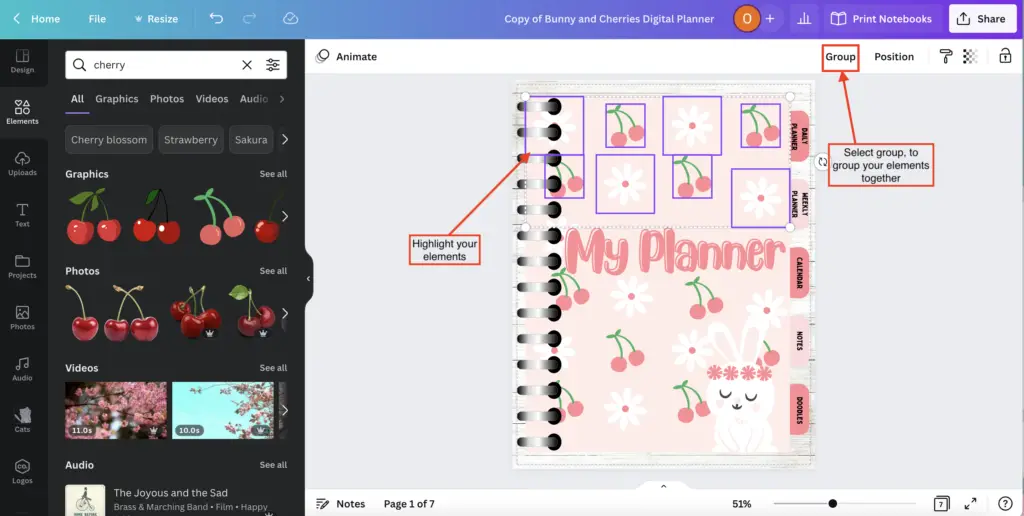
Grouping elements together using Canva
When creating patterns, a great tool to use on Canva is ‘group’. The group tool allows you to group all your elements, allowing easy access to duplicating your elements, changing your graphic colours and adjusting the size and angles.
To use the ‘group’ tool, highlight your elements and select ‘group’ on the top ribbon.
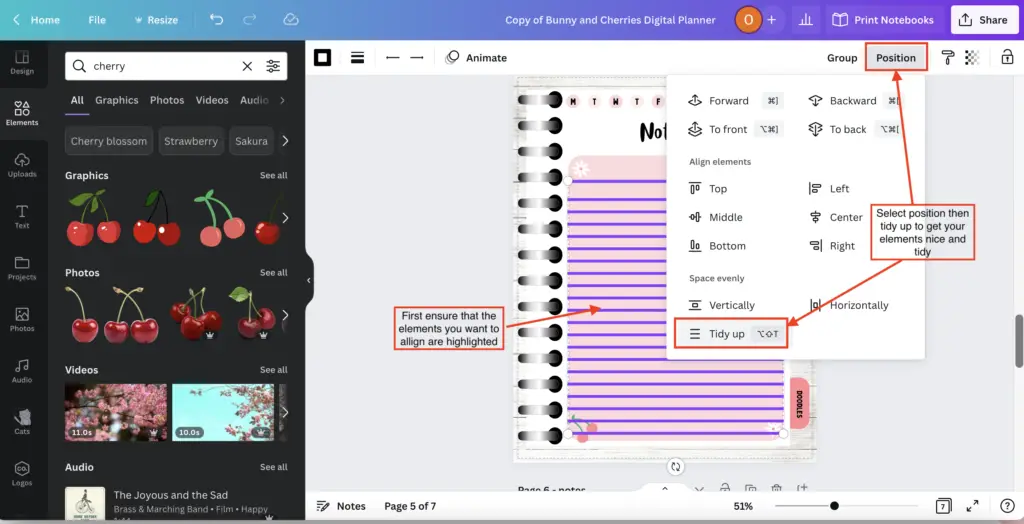
Canva Tidy up tool
To ensure that your lines, boxes, shapes, text, and elements are aligned, you can use a trusted little tool in Canva called ‘tidy up’.
First, highlight all the elements you want to be aligned with to use this tool. Then, select ‘position’ on the top ribbon and ‘tidy-up’. And voila, your items are nice and aligned.
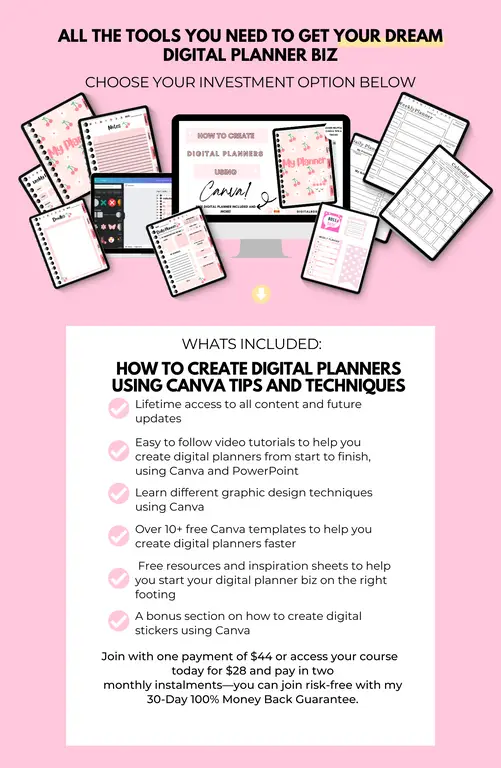
How to create a digital planner using Canva Tips and Techniques Course
If you want to create digital planners using Canva for personal use or to build your digital business but don’t know where to start, then this course is for you!
Imagine being able to……..
- Create a fun and cute digital planner for free
- Use the free Canva tool confidently with no graphic design experience
- Create pretty patterns using Canva
- Create easy-to-do digital stickers
- Build a digital planner biz
If this sounds like you, then…
And best of all, this course is only $44, yep you heard me! Only $44!!!
Or you can pay today for only $28 and pay in two monthly instalments.
Final Thoughts: Create Digital Planners Using Canva Tips and Techniques
Alrighty, and that’s it, folks.
I hope you found this post useful!
I would be lying if I said that creating digital planners is not a lot of work…
Because initially, it sure is!
But you got this!
The main point of this post is trying to get you to understand the design process of a digital planner.
Once you understand what you need to do to create a digital planner, you can use that knowledge in implementation.
Also, play around with Canva and your designs; trust me, you’ll be that confident digital planner creator in no time.
Remember to take the opportunity to use my free Canva Pro 30-day trial link, and this will help you get your design juices flowing.
Also, if you want a fully detailed step-by-step tutorial of the digital planner design process using Canva, check out the How to Create a Digital Planner using Canva Tips + Techniques course.
You May Also Love:
- How to create a digital planner to sell using Canva like a boss
- Canva Free vs Canva Pro: Which one is worth it?
- How to make a digital planner with hyperlinks using Canva for free
- How to sell digital planners on Etsy and make passive income fast
Tools To Use To Help Build Your Digital Planner Empire:
- Try Canva Pro free for 30 days
- Get 30-days free Skillshare access
- Visit my PLR Canva Template Shop
- Download amazing graphics and fonts with Creative Fabrica and Creative Market
- A helpful guide to opening an Etsy store
- Get your 40 free Etsy listings
- My Etsy shop (for digital planners and printables) use the Promo code: THANKYOU22 for a 5% discount on all purchases.
- Learn how to create incredible digital planners to sell on Etsy with the Create Digital Planners Like A Boss Babe Course