*This post may contain affiliate links, meaning If you use these links to make a purchase, I may earn a small commission at no cost to you. Thanks.*
Are you looking to create a digital planner with hyperlinks using Canva?
Well, you’re in the right place!
In this blog post, I’ll show you how to create a strawberry digital planner with hyperlinks using Canva for FREE!
What are you waiting for!!
Stay tuned to learn the core techniques in creating digital planners with hyperlinks to help you on your digital planner business journey.
If you’d rather watch a video, here is an in-depth youtube video that will teach you how to create this strawberry digital planner.
Or, you can access the free strawberry digital planner mini-course here.
What is a digital planner?
A digital planner is essentially the same as a paper planner; instead of a paper planner, it is an interactive PDF digital planner that can be used on an iPad or tablet.
As with the paper planner, a digital planner allows you to organise your days, months, and weekly, track your goals, and keep you motivated.
With digital planners, you can include hyperlinks, add digital stickers, duplicate pages, and the flexibility to create incredible digital planner covers.
The best thing about selling digital planners is that you don’t have to deal with all the logistics of selling paper planners, such as delivery, returns, and restocking.
Once you upload your digital planner on, let’s say, Etsy, you don’t have to do anything but watch the sales roll in – the customer will get the digital file instantaneously.
What is Canva?
Canva is an intuitive graphic design platform where you can create many design content, such as invitations, presentations, social media content, stickers, and posters.
What I like about Canva is that it is super simple to use, even if you’re a beginner in graphic design. It has many tools and resources to help you create an amazing digital planner.
One of the best things about Canva is that it has a free version that offers so many resources and tools that you won’t find anywhere else for free.
But also, their paid version, Canva Pro, is highly affordable and will take your digital planners to the next level.
Exclusive for you, I have a 30-day free Canva Pro trial, where you can try it out and see if it’s the perfect fit for you. Or why not use this opportunity to create as many free digital planners within 30 days and start selling them – what do you have to lose?
How to make a digital planner with hyperlinks using Canva for free
If you want to learn how to create digital planner pages, click here to find out more!
The standard size dimensions for a digital planner are 8.5 × 11 inches.
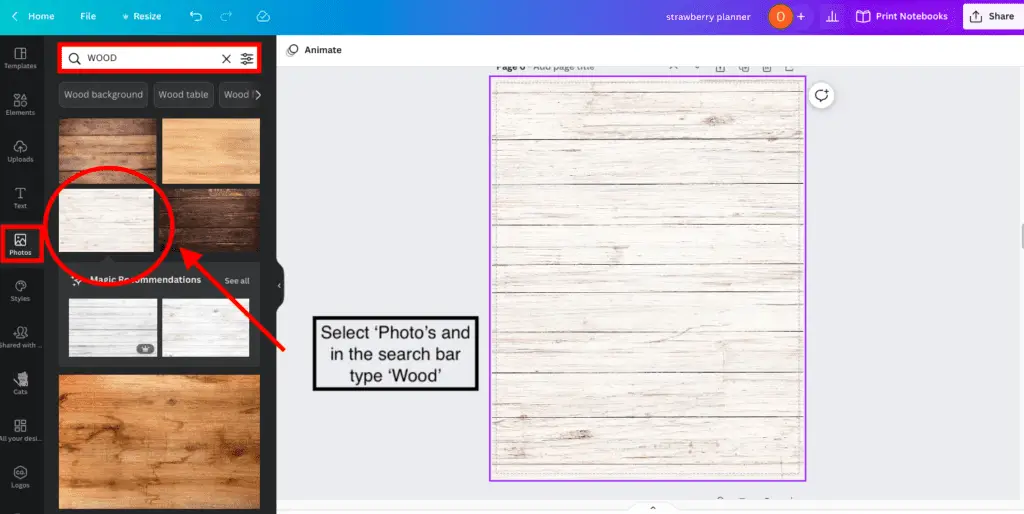
Step one: Create a realistic backdrop
When creating digital planners, it’s best to add a realistic background to make the digital planner‘ POP.’ Adding a wood background is a common feature in many digital planners. To add a wood background in Canva, select the ‘Photo’ tab on the left-hand side, type ‘Wood‘ in the search bar, and select your desired wood background.
You don’t always have to add a wood background. You could also change the colour of the background to match your planner.
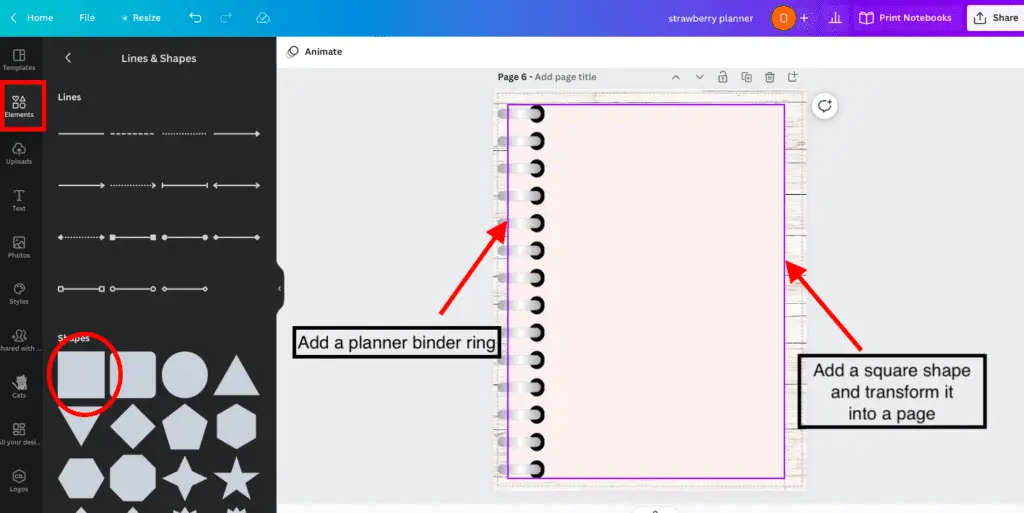
Step Two: Create your digital planner template
Next, you need to start creating your digital planner template.
First, add a page which you can do by using a square shape; next, add a planner binder ring by searching binder rings in the search bar.
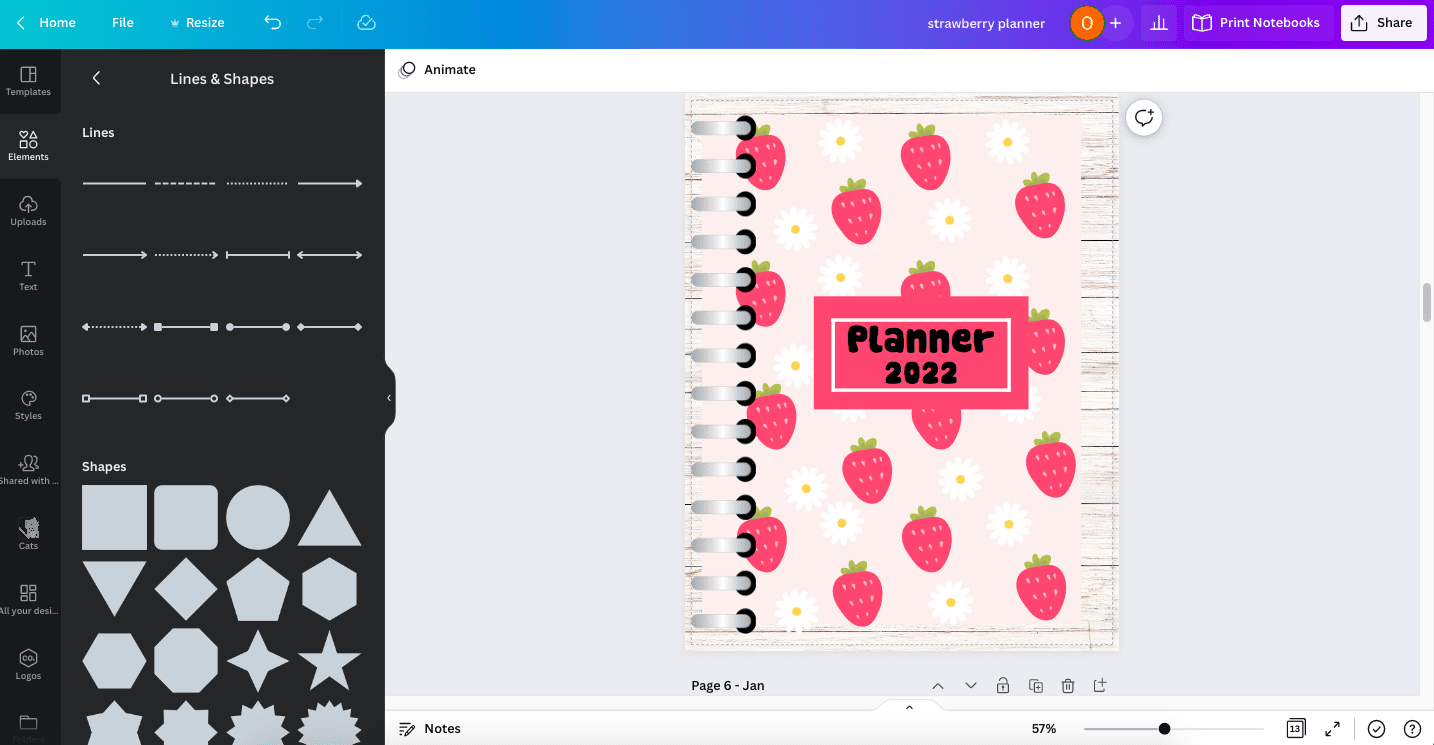
Step Three: Create your planner cover and pages
Now that you have your planner template, you can start to create your planner cover and pages.
Before you start creating, I recommend planning your planner cover, page design, and layout. You can use websites like Pinterest, Etsy, and Amazon to help inspire you to create your own planner designs.
Suppose you are struggling with this step, head over to my digital planner blog post, where I will show you some simple steps in creating engaging planner covers for free using Canva.
Or you can visit my how to create digital planner blog post, where I give a tutorial on creating a daily digital planner template.
Have a look at the Strawberry digital planner cover I created below. If you want to create this strawberry planner, check out my free digital planner mini-course!
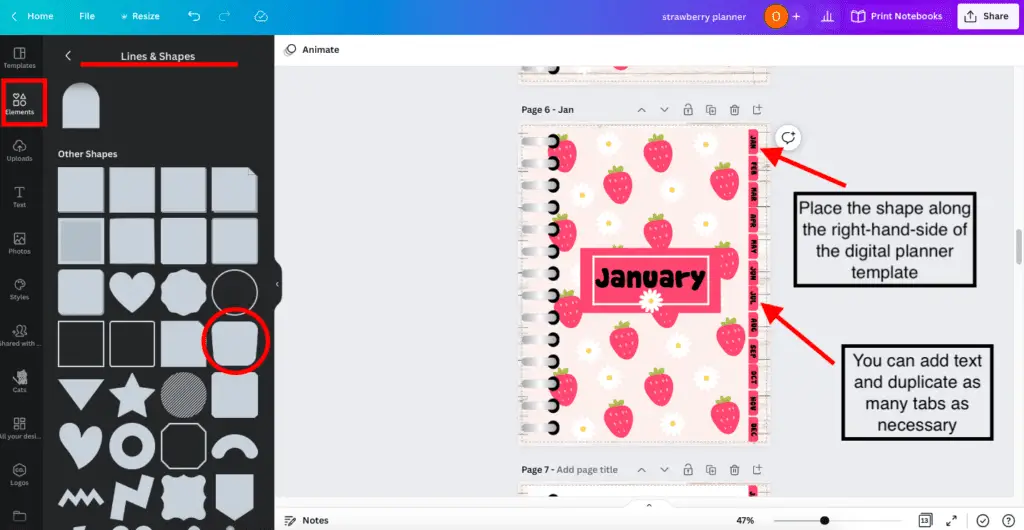
Step Four: Adding tabs and how to make a digital planner with hyperlinks tabs using Canva
This next step is crucial if you want to learn how to hyperlink your tabs using Canva.
Okay, so you need to open ‘Lines and Shapes’ in the elements tab, then select ‘Rounded Shape’.
Place the shape along the right-hand side of your digital planner template, add text, and duplicate as many tabs as you need. You can also change the tabs’ colour and modify them to your liking.
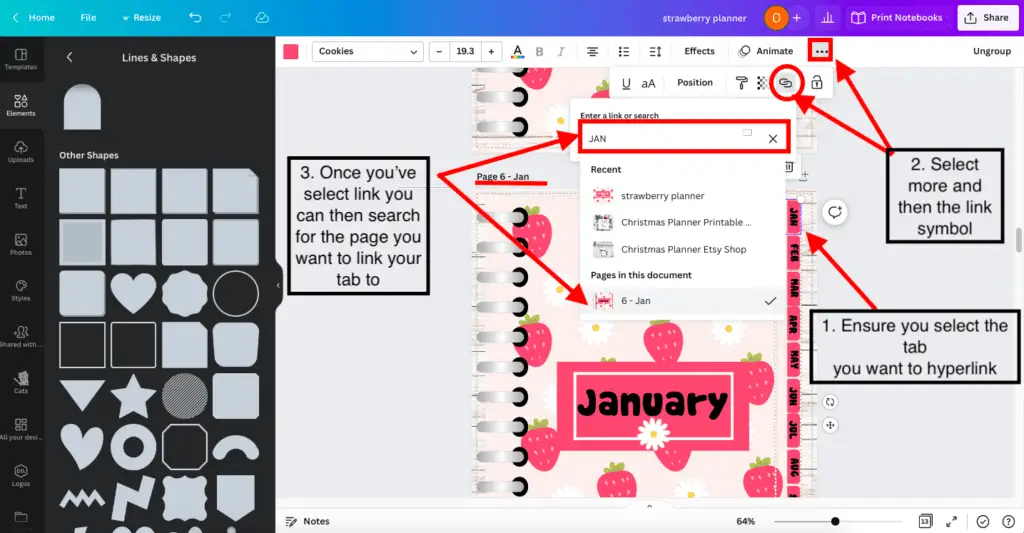
Next, to add hyperlinks to your tabs, you need to select the more tab (symbol with three dots) on the top ribbon and then the link symbol (you can hover over the symbol if you are unsure which one is which).
After that, there will be a drop-down where you can select the page you want to hyperlink with the associated tab.
A quick tip: I recommend naming your pages, so it’s easier to search for the page you want to hyperlink.
Now that you’ve selected the page you want to hyperlink to your tab, you must select done, and viola, your page is hyperlinked to the associated tab.
Step Five and final step: Download and double-check the hyperlinks
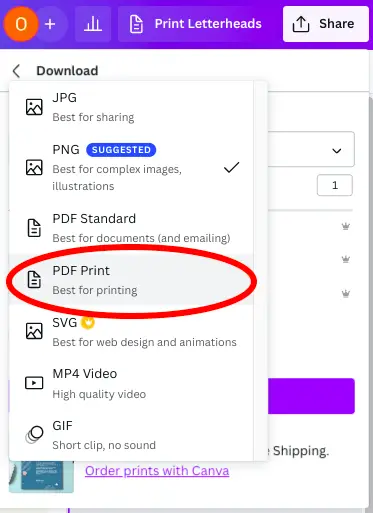
Select the share button on the top right-hand side to download your digital planner.
Select the drop-down and scroll down to ‘PDF Print‘.
After downloading your digital planner, ensure that you double-check everything- font, graphics, spelling, colours, and hyperlinks.
How to upload a digital planner to goodnotes from MacBook
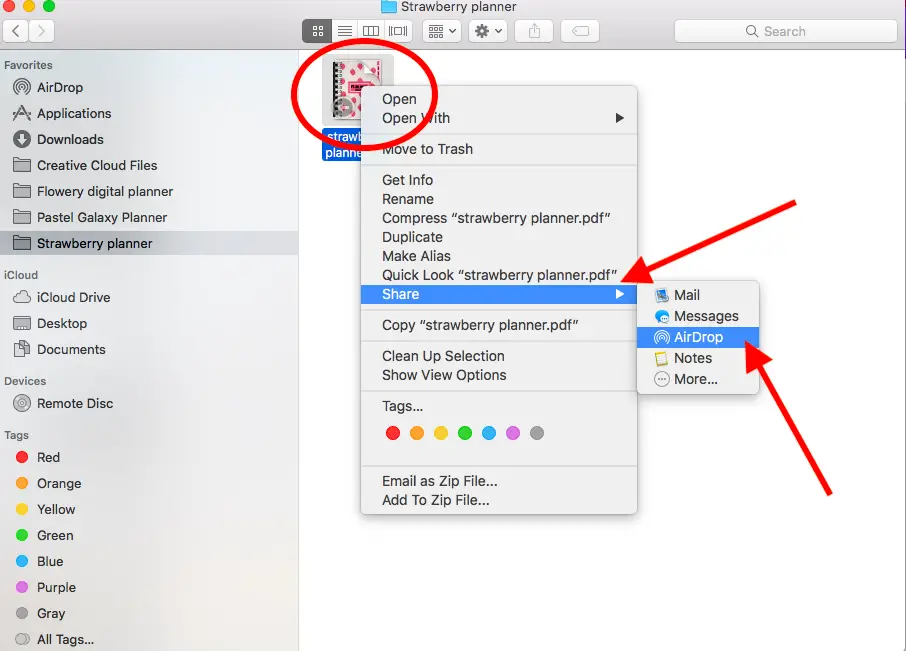
To upload your digital planner to goodnotes using a MacBook (if you don’t have to Goodnotes app on your MacBook), you need to select your digital file in ‘Finder’, right-click on the file and select ‘Share’. Once you’ve selected Share, a drop-down will appear; here, you need to click on ‘AirDrop’.
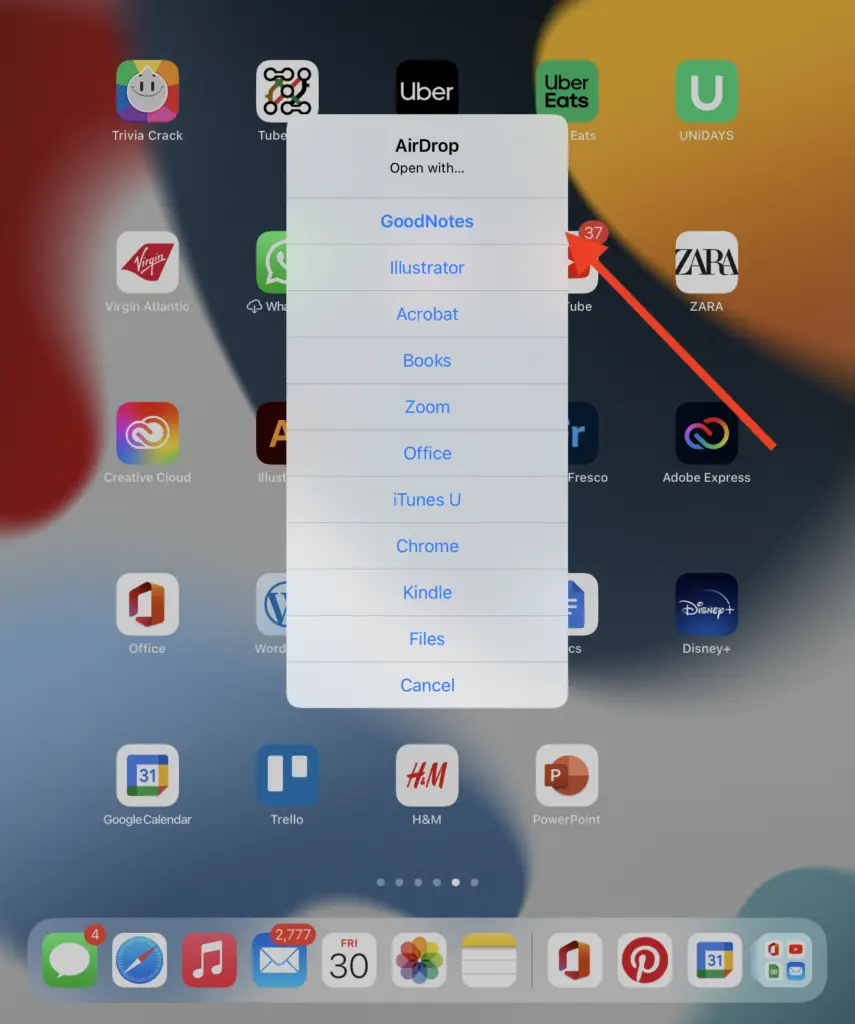
Airdrop to the device you want to connect to, and then in your selected device, a menu will appear with all the options you can upload your digital planner to; in our case, we want to upload the digital planner to Goodnotes.
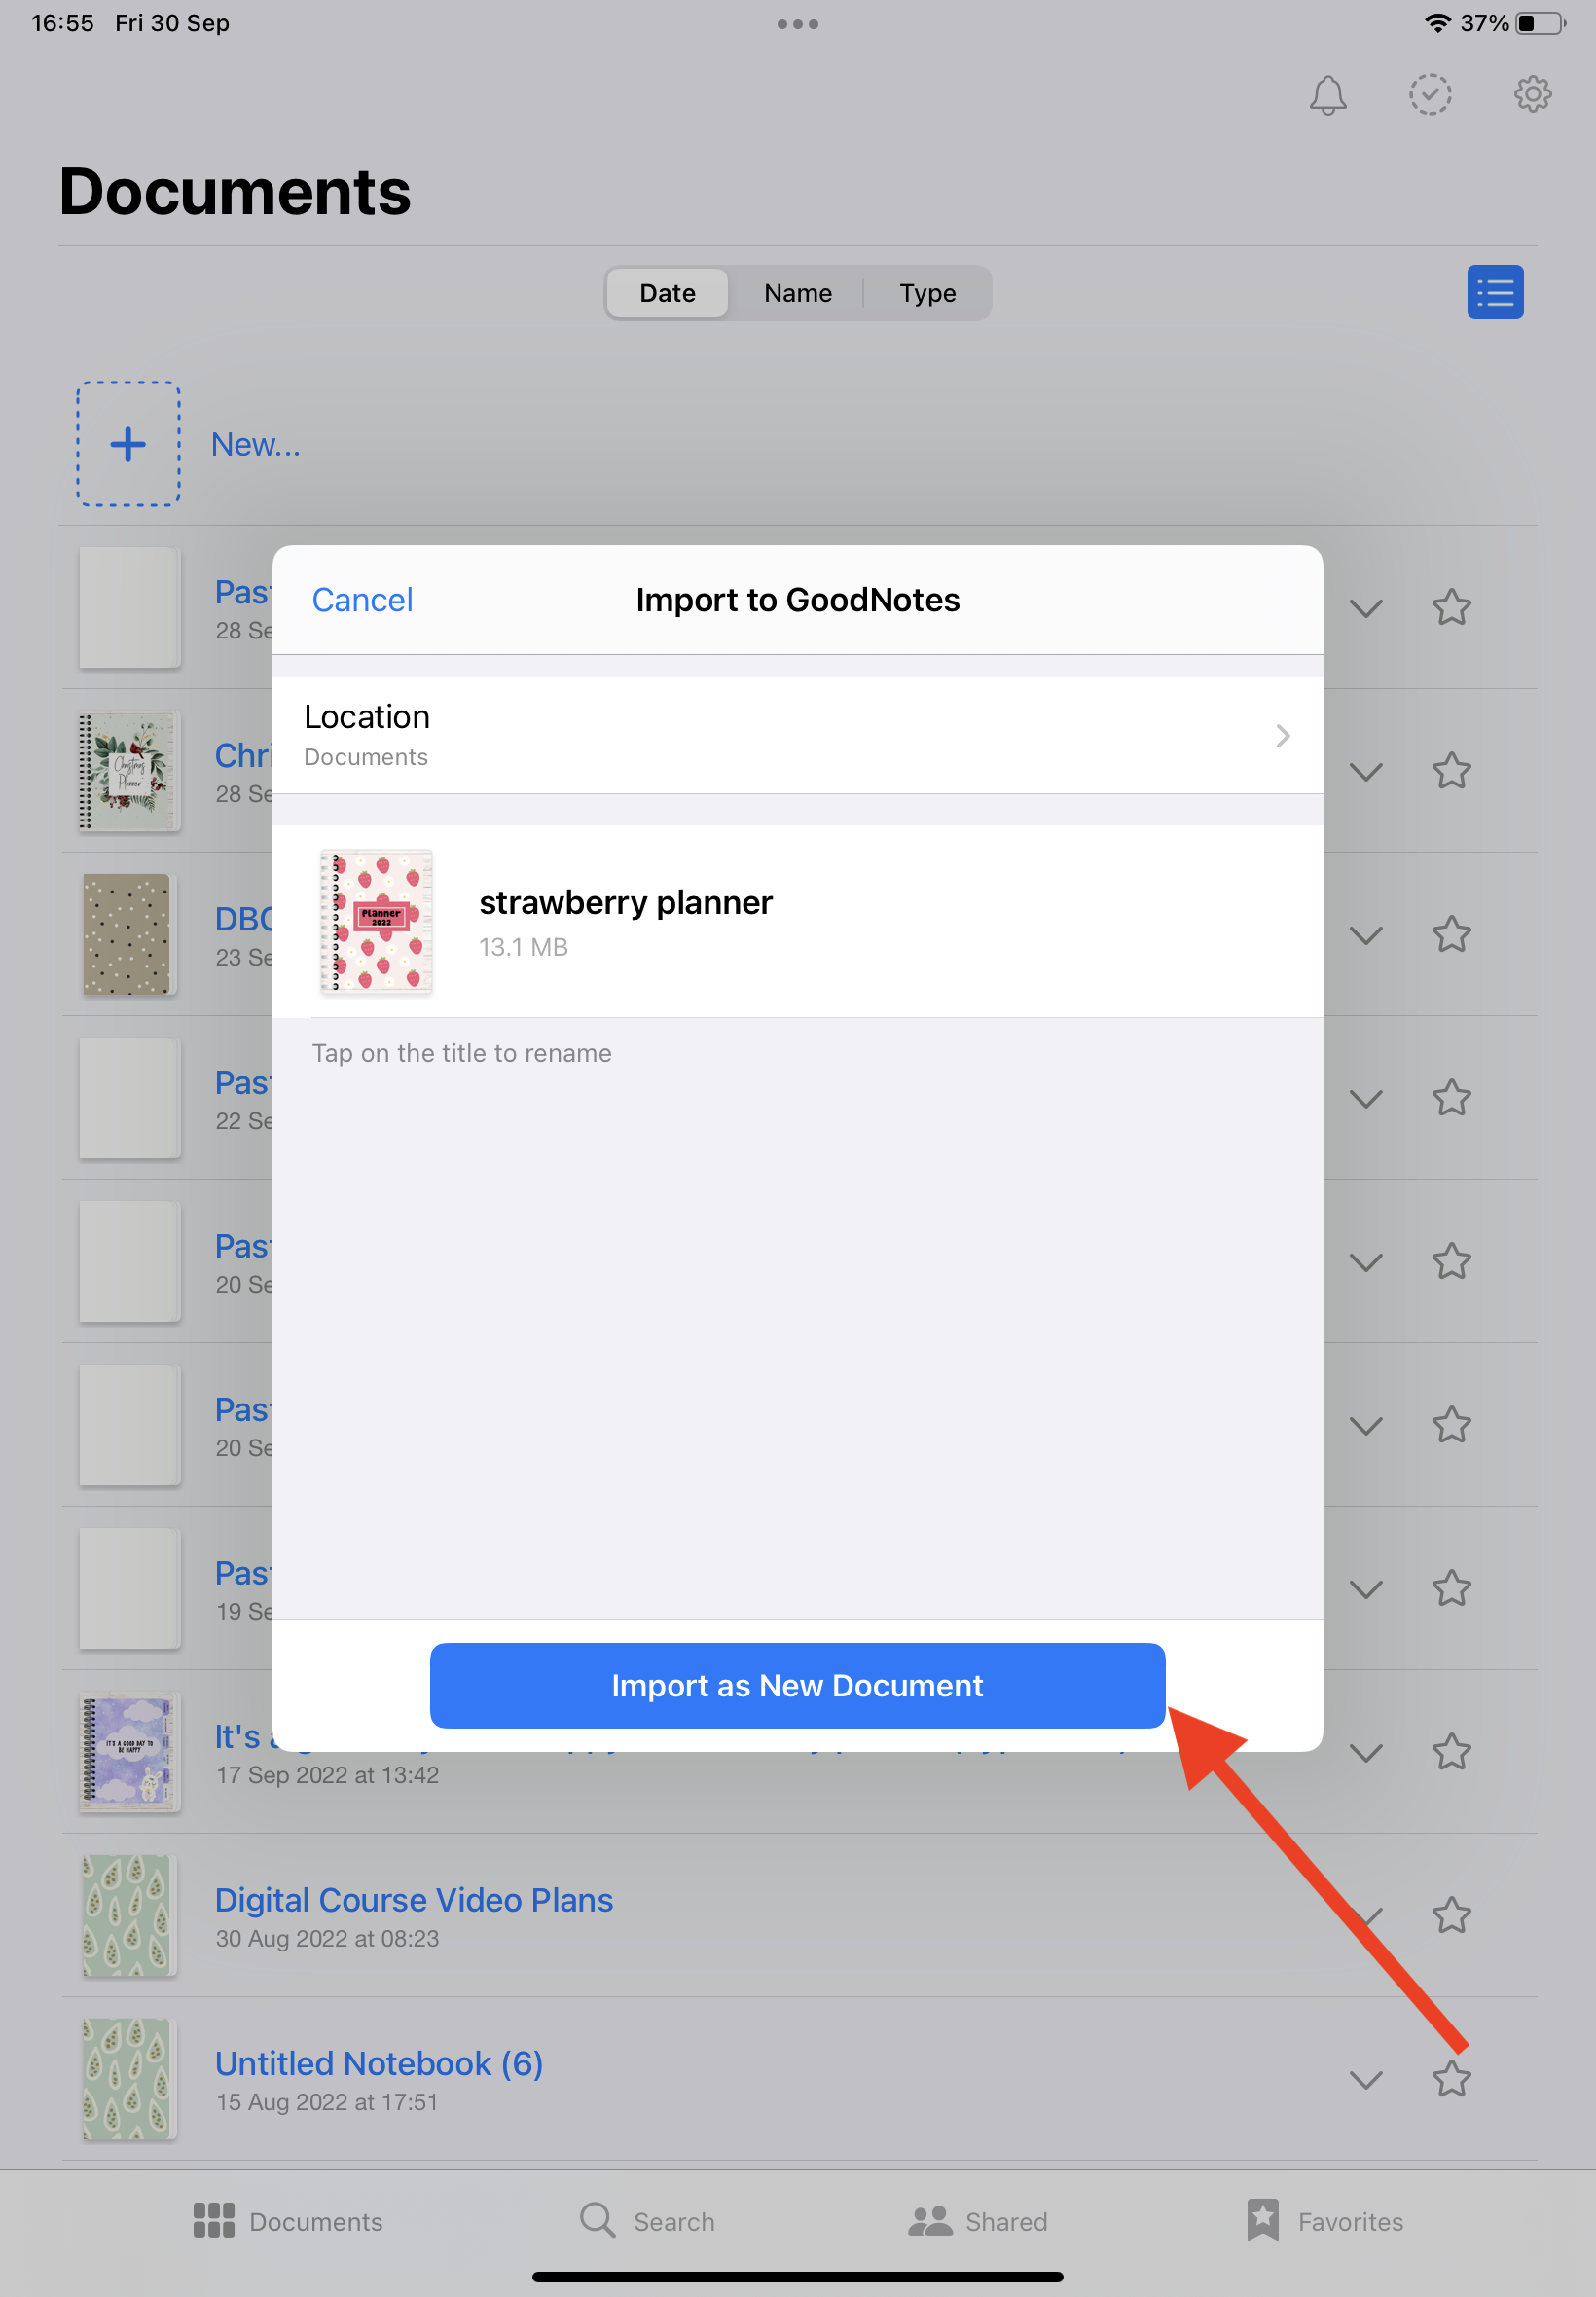
After you’ve selected Goodnotes, your device will open Goodnotes and will give you the option to import the digital planner as a ‘New Document’. Here, you’ll be able to use your digital planner in Goodnotes.
Free Strawberry Planner Mini-Course.
Are you looking to create digital planners using Canva for free to make extra money? I have the perfect free mini course for you!
This free digital planner course includes:
- Easy step-by-step video tutorials
- Strawberry digital planner cover tutorial
- Strawberry digital notes planner pages tutorial
- Strawberry digital calendar page tutorial
- Strawberry digital weekly planner page tutorial
- Bonus: how to create an income tracker tutorial from my create digital planners like a boss babe course
- X2 digital planner free digital planners (including the strawberry digital planner) that can be used for commercial use
- Exclusive 15% discount on the create digital planner like a boss babe course.
Final Thoughts: How to make a digital planner with hyperlinks using Canva
Alrighty, folks! That’s it!
I know there was a lot of information to unpack, but don’t worry; there’s no rush in creating digital planners.
Once you get the hang of it, you’ll be able to create digital planners in your sleep.
However, one thing that can help you speed up the process is by using Canva!
Canva is an incredible resource for all digital planner creators out there!
If you don’t believe me, use my link and try Canva Pro for yourself for free for 30-days.
I’m so happy you’ve taken the time to read this blog post.
If you have any questions or comments, let me know in the comment box below.
You may also love:
- How to create a digital planner to sell using Canva like a boss
- Canva Free vs Canva Pro: Which one is worth it?
- How to add hyperlinks to your digital planner the easy way with PowerPoint?
- How to sell digital planners on Etsy and make passive income fast
Tools To Use To Help Build Your Digital Planner Empire:
- Try Canva Pro free for 30 days
- Get 30-days free Skillshare access
- Visit my PLR Canva Template Shop
- Download amazing graphics and fonts with Creative Fabrica and Creative Market
- A helpful guide to opening an Etsy store
- Get your 40 free Etsy listings
- My Etsy shop (for digital planners and printables) use the Promo code: THANKYOU22 for a 5% discount on all purchases.
- Learn how to create incredible digital planners to sell on Etsy with the Create Digital Planners Like A Boss Babe Course