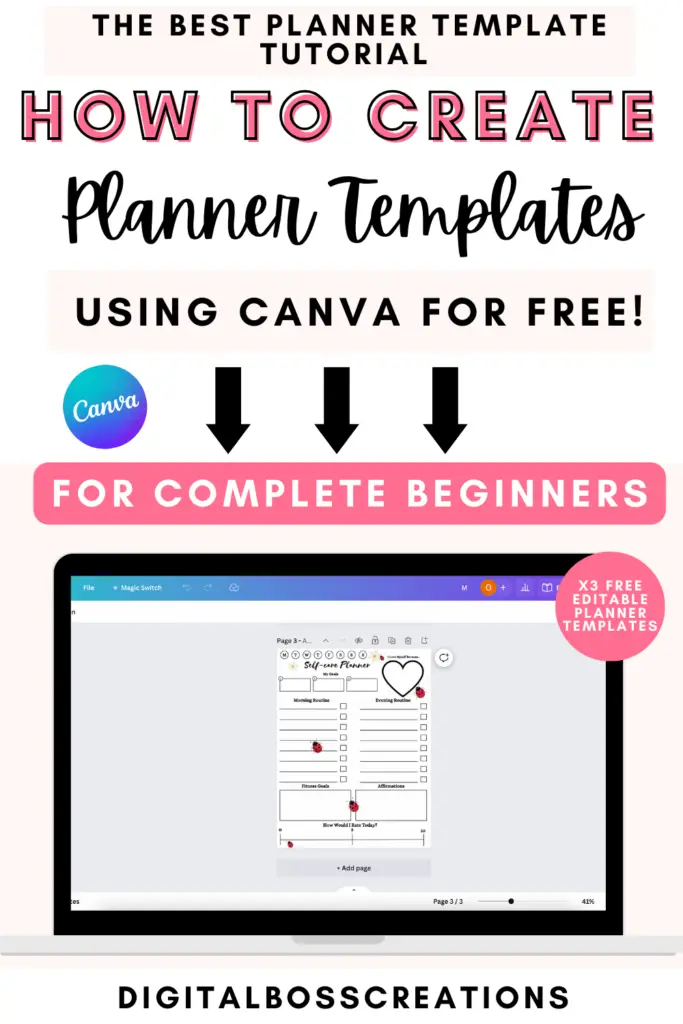
Are you looking to design your own planner pages using Canva for free but don’t know where to start?
Don’t worry; I was in your shoes too! I always wanted to learn how to create planner pages without breaking the bank. After many trials and errors and endless googling, I can now create digital planner pages with my eyes closed.
And guess what! You can, too!
I have created an easy-to-follow planner pages tutorial to help you create three incredible planner pages that you can use immediately.
I’m here to help!
So, sit back and relax whilst I go through the tutorial on how to design your own planner pages just for you.
What is Canva?
First things first, what is Canva?
Canva is an amazing, easy-to-use graphic design platform that can help you create amazing designs such as social media posts, printables, presentations, invitations, posters, and digital planners.
I love Canva because it’s beginner-friendly, and you don’t need to be a professional graphic designer to create incredible designs!
Canva is free to use, although they have a paid (Canva Pro), which is super affordable at $11.99 a month.
I have just a 30-day Canva Pro free trial for you! Check out Canva Pro now; trust me, you won’t regret it.
Design your own planner pages using Canva tutorial
Now, the fun begins!
I will show you how to create three different planner pages. They include a daily planner, weekly planner and self-care planner pages.
Creating planner pages is easy and uses different shapes, colours, fonts, and other elements.
Top tip: I like researching on Pinterest first to help me spark ideas. I then use that inspiration to draft my planner pages.
Okay, let’s get creating planner pages.
Daily Planner tutorial
In the first tutorial, I’ll show you how to create a daily planner in three easy steps
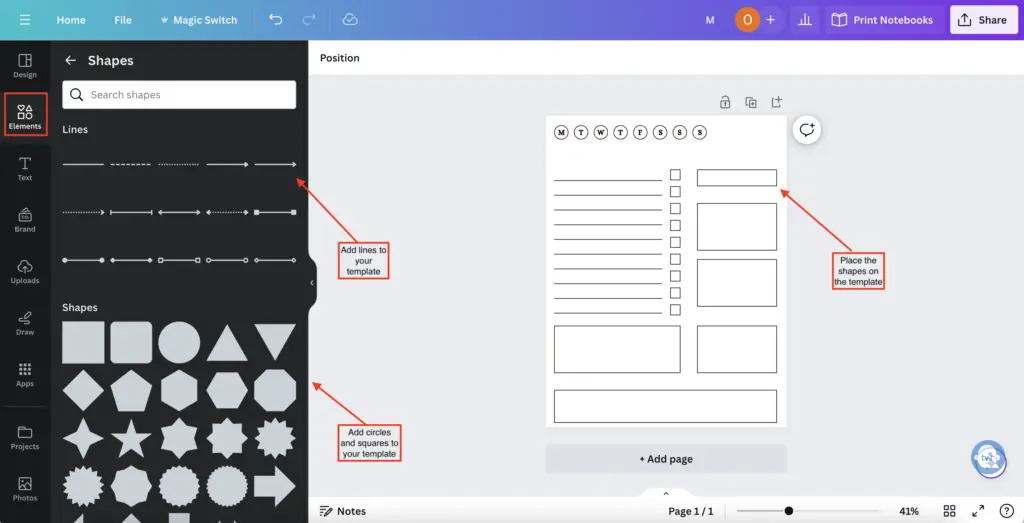
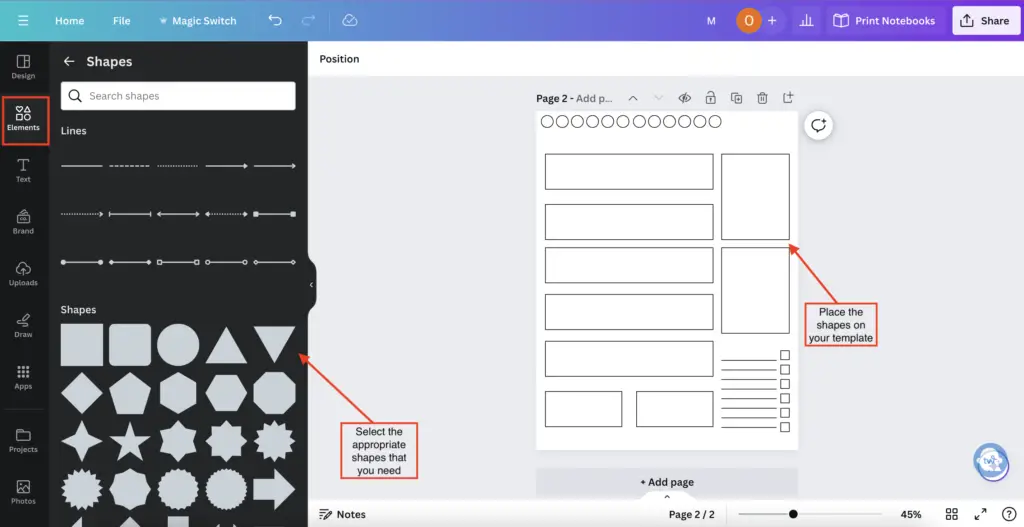
1. Add shapes to your template
To add shapes, select the ‘Elements’ tab on the left ribbon and select ‘Shapes’, where you’ll be given many shapes to choose from for your template.
I recommend sticking to circles, lines and squares to create the basis for your template.
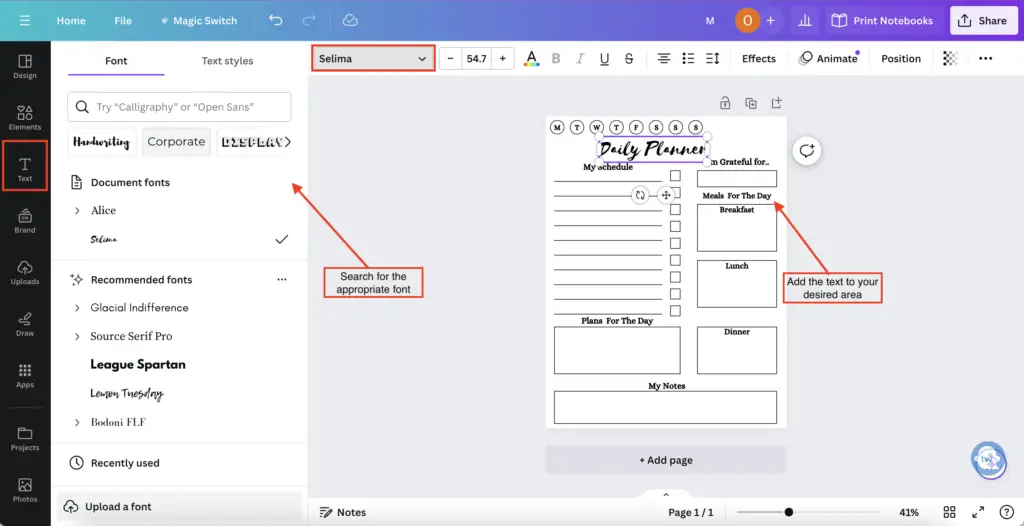
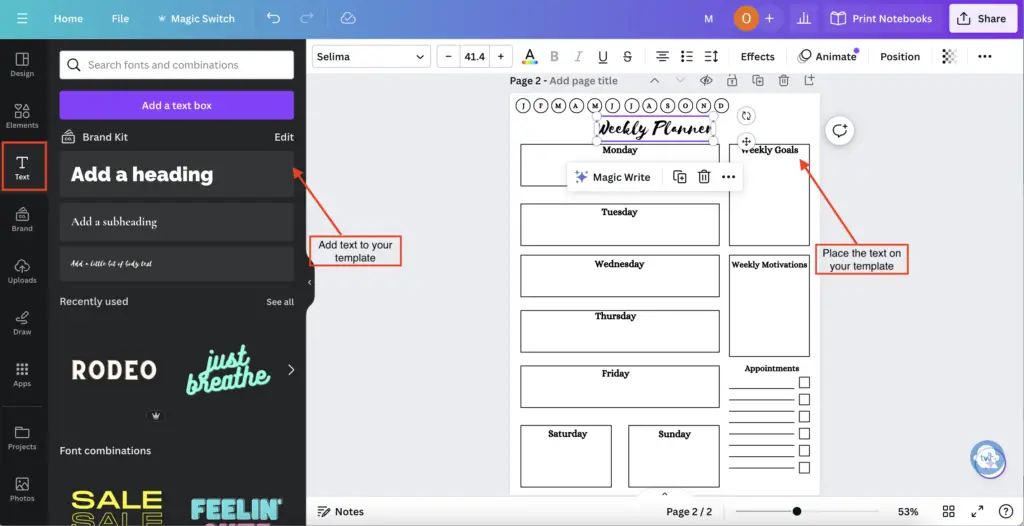
2. Add text to your template
Next, we need to text to our daily planner template. To do this, select ‘Text’ on the left ribbon and place the text in your desired area.
To change the font, use the dropdown menu and search for your perfect font.
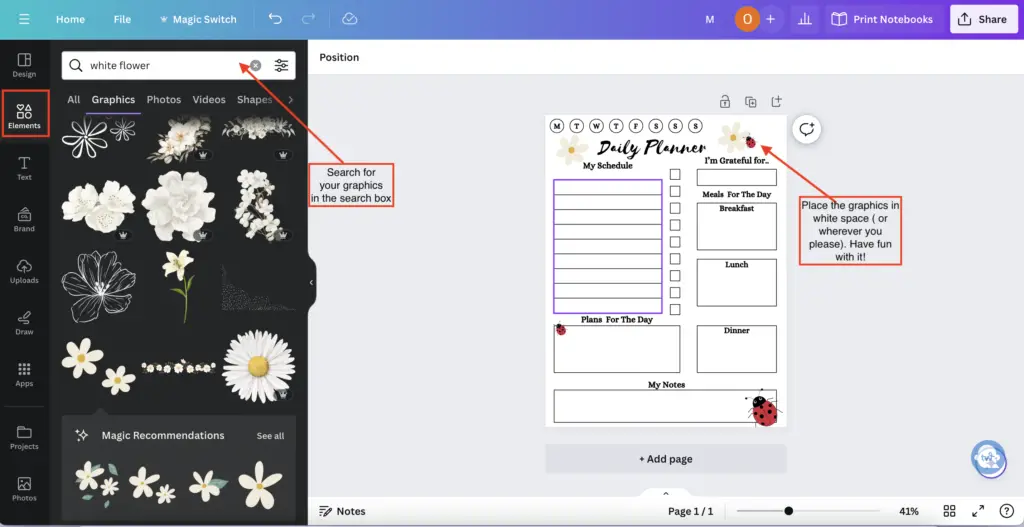
3. Add graphics to your template
Lastly, to make your planner template fun and engaging, use the element tab to search for your amazing graphics.
Once you’ve found your graphics, place the graphics in white spaces to help fill in the dull space.
Weekly Planner tutorial
In the second tutorial, I’ll show you how to create a weekly planner page in three easy steps.
1. Add different shapes to your template
Similarly to the daily planner, we must add shapes to our weekly planner template.
The placement of the shapes on the template is different to the daily planner template.
There are more squares and rectangle shapes. Also, there’s a mini checklist on the weekly planner template.
See if you can copy the design below using the ‘Elements’ tab on the left ribbon.
Or get creative with it and design your amazing basis for the weekly planner template.
2. Add some fun text to your template
Next, we need to add text to our template. Again, to do this, select ‘Text’ on the left side ribbon.
The weekly planner has different sections for the days of the week and areas about goals, motivations, and appointments.
Adding text helps divide sections, especially when a lot is happening.
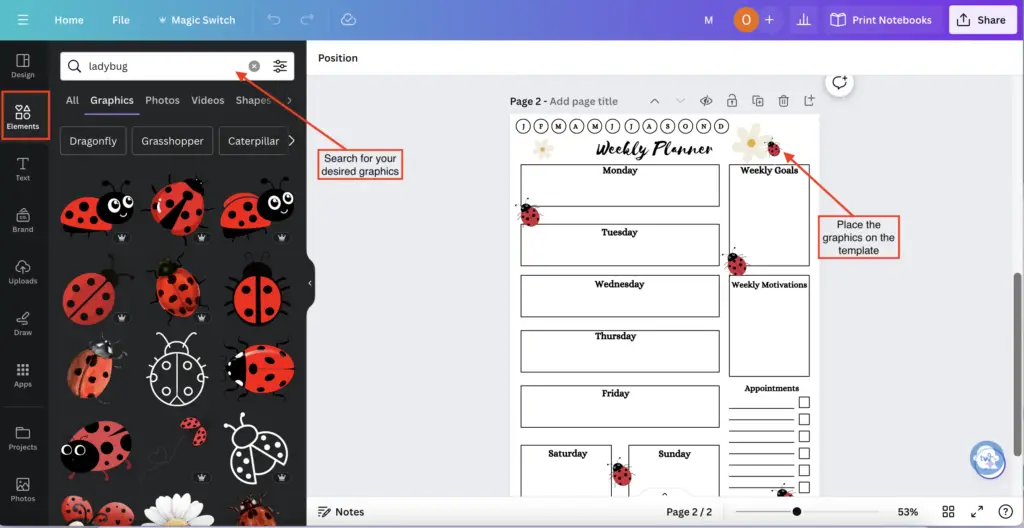
3. Add engaging graphics to your template
This is my favourite part! Adding graphics…
You may have noticed I’ve gone for a ladybug theme. I’ve placed the ladybug’s graphics strategically in white spaces.
To search for graphics, select the ‘Element’ tab and search for the graphics you desire.
Tip: if you need help finding suitable graphics for your planner templates, don’t be afraid to research and get inspired by other designs.
Self-care Planner tutorial
In the last tutorial, I’ll show three easy steps to create a self-care planner page.
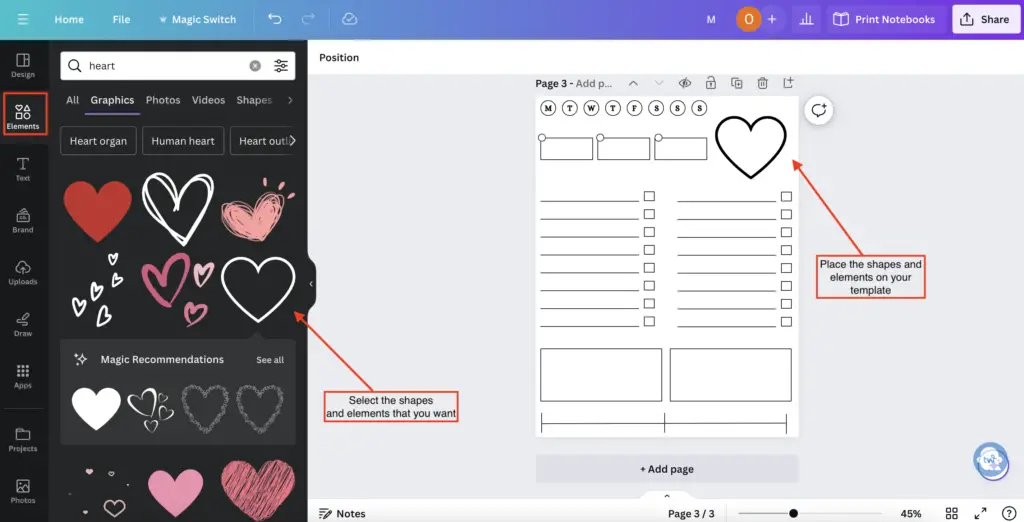
1. Add fun shapes and lines to your template
First, you need to add shapes and lines to form the layout of your self-care planner page.
Use the ‘Elements’ tab to add shapes and lines to your template.
See if you can recreate your self-care planner page using the design below.
Tip: To make your template more engaging, incorporate fun shapes. Look at my design below, where I’ve used a heart for a section within my template.
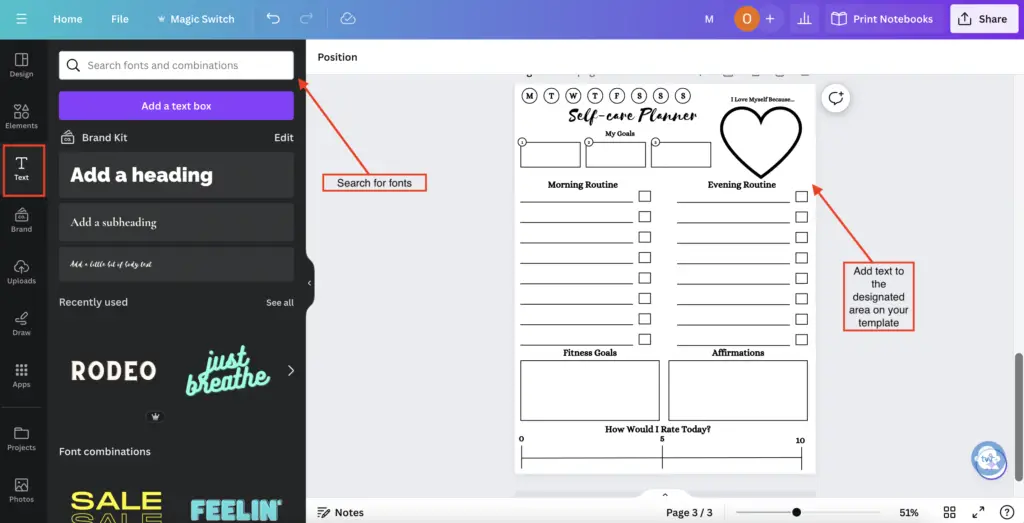
2. Add engaging text to your template
Next, add text to your template using the ‘Text’ tab.
You can change the font by searching for your desired font in the search bar.
One thing that I like to do with text is to use at least two different fonts to make the planner page more appealing.
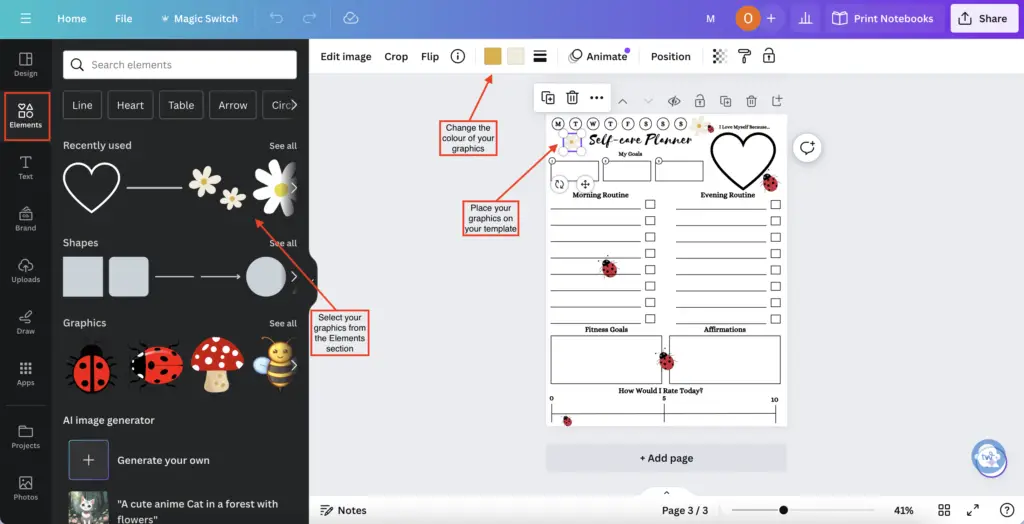
3. Add your desired graphics to your template
Lastly, graphics!
Again, add your desired graphics to your template.
You can also change the colour of your shapes and elements to make your template more fun and fabulous.
Final Thoughts: How to design your own planner pages using Canva for free?
And that’s it, folks: A quick tutorial on how to design your own planner pages using Canva.
I hope you have found this blog post helpful and that you’re now a pro at designing your own planner pages using Canva.
If you want to download the Canva planner pages used for this tutorial for free, click here.
Let me know if you have any comments or questions in the comments section below.
You May Also Love:
- How to create a digital planner to sell using Canva like a boss
- How to make a digital planner with hyperlinks using Canva for free
- How to sell digital planners on Etsy and make passive income fast
- How to upload your digital planner to Etsy and start making sales?
Tools To Use To Help Build Your Digital Planner Empire:
- Try Canva Pro free for 30 days
- Get 30-days free Skillshare access
- Visit my PLR Canva Template Shop
- Download amazing graphics and fonts with Creative Fabrica and Creative Market
- A helpful guide to opening an Etsy store
- Get your 40 free Etsy listings
- My Etsy shop (for digital planners and printables) use the Promo code: THANKYOU22 for a 5% discount on all purchases.
- Learn how to create incredible digital planners to sell on Etsy with the Create Digital Planners Like A Boss Babe Course