Are you ready to start making sales on Etsy from your digital planners?
But there’s just something that’s holding you back.
You’re trying to understand how to upload your digital planner to Etsy and start making sales.
Don’t worry; I was like you, confused and overwhelmed and often thought…
“How the heck do I upload my digital planners to Etsy”?
It was frustrating!!!
I often get messages asking me how to upload digital planners on Etsy.
So, I’m here to give you a step-by-step tutorial on how to upload your digital planner on Etsy and start making some extra cha-ching.
By the end of this blog post, you’ll be a master in uploading amazing digital planners/digital products to Etsy.
If you’re interested in learning how to sell digital planners on Etsy, I offer a comprehensive course that covers everything you need to know.
Etsy digital planner listing checklist?
Before we get into the nitty-gritty of how to upload your digital planner to Etsy, It’s worth noting that there are some things you need to consider before publishing your digital listing.
I’ve included a little Etsy digital planner listing checklist to help you.
- Make a plan: you need to make a plan outlining your budget to make digital and sell digital planners, your product(s) price, realistic objectives ( i.e. how many digital planners do you want to sell a week/month), the name of the product(s), and your overall goals.
- Research your competition: you need to scope out your competitors. Research what they are currently doing, what their listing looks like and the pricing of their digital planners.
- Create mockup photos: have ready-made mockup photos of your digital planner before you list your product on Etsy. Check out my blog post on creating the perfect Etsy listing photos for digital planners.
- Create your title and description: ensure you have created your listing title (name of the product) and description ready to be uploaded to your listing. Trust me; this will save you so much time. If you’re struggling to write an SEO Etsy listing description, this blog post is for you!
- Etsy Seller Handbook: Read the Etsy Seller Handbook to ensure you start selling on Etsy on the right foot.
*This post may contain affiliate links, meaning If you use these links to make a purchase, I may earn a small commission at no cost to you. Thanks.*
How to upload your digital planner to Etsy?
Now I will give you a full step-by-step tutorial on how to upload your digital planner to Etsy.
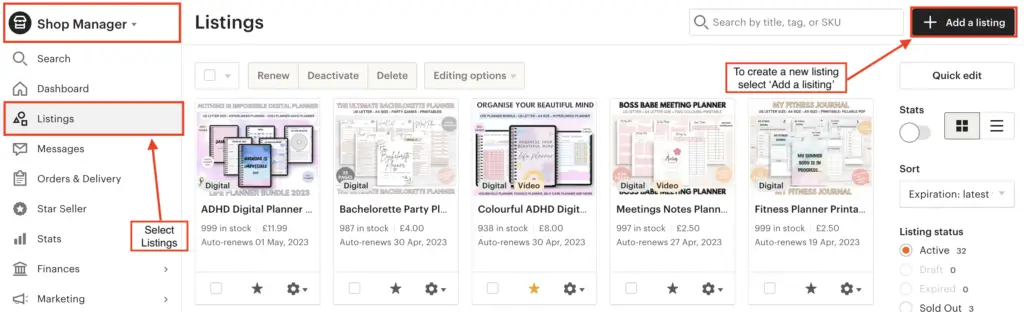
1. Adding a new listing on Etsy
First things first, you need to head to ‘Shop Manager’, and on the left ribbon, select ‘Listings.’ Once you’ve done that, in the top right corner, select ‘Add a Listing.’
2. Adding your photos on Etsy
To add a photo to Etsy, you can drag and drop your photo into the photo section on Etsy.
Or you can click ‘Add a photo’ and upload your photo from your computer drive.
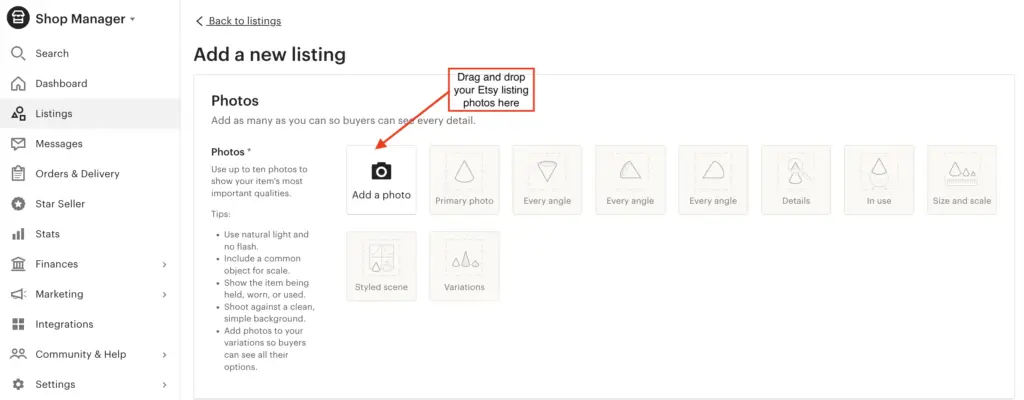
Only up to ten photos are permitted for upload on Etsy, and the recommended Etsy listing photo size is 2600 (wide) x 2000 (tall) px.
Grab your free Etsy listing photo template here…
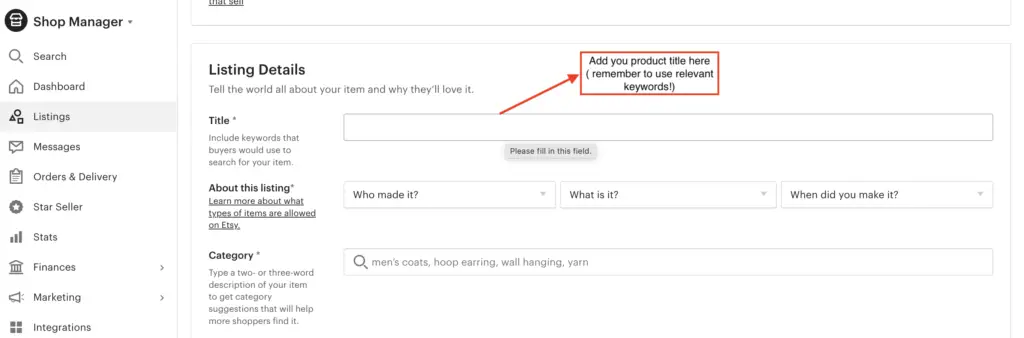
3. Include your Etsy listing title
Here you need to include a title with relevant long-tail keywords to ensure your digital planner listing is fully SEO optimised and will appear on the first page on Etsy.
Quick tip: I highly recommend doing keyword research on your digital planner before uploading your listing. You’ll have your relevant keywords ready to be incorporated in your title and description.
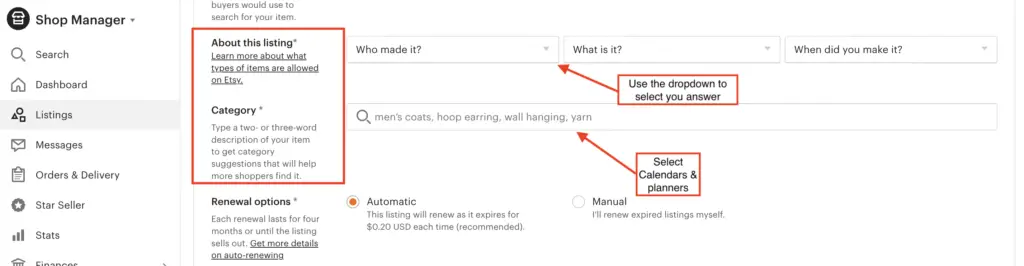
4. Include details about your listing and category
Next, you need to ensure that you select the correct details about your listing:
- Who made it?
- What is it?
- When did you make it?
This part includes a simple dropdown with predefined answers. You don’t need to write anything specific.
After, select a category for your digital listing. Digital planners fall under ‘Calendars & planners.’
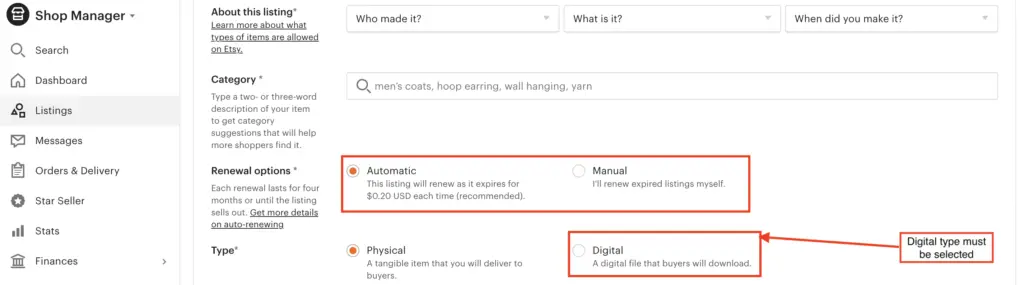
5. Renewal options and product type
This part is important!
There are two renewal options: Automatic and Manual
Automatic means that Etsy will automatically renew your listing when it expires
Manual, however, means you must renew your listing yourself once it has expired.
The product type for digital listing is ‘Digital’, which will allow you to upload your digital files to Etsy.
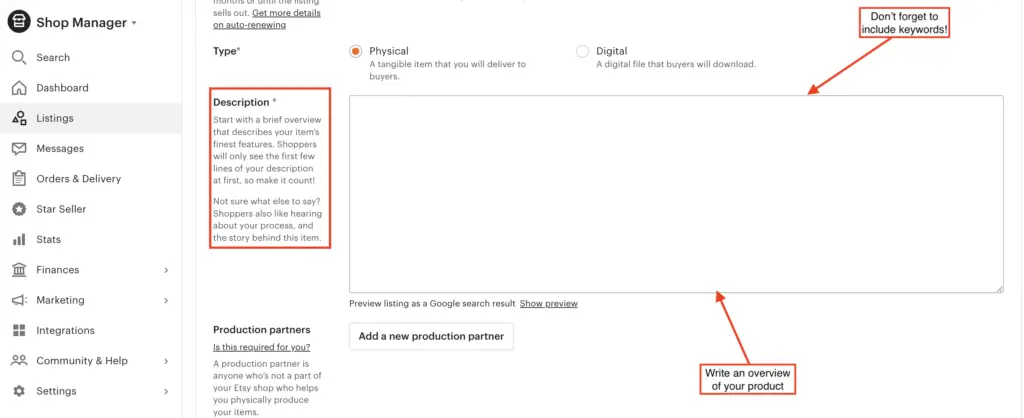
6. Add your Etsy listing description
Your Etsy description must include everything you need to know about your product. This includes what your product is called, a detailed description, its features, policies, how to download your product and contact details.
Download your free Etsy listing description workbook here.
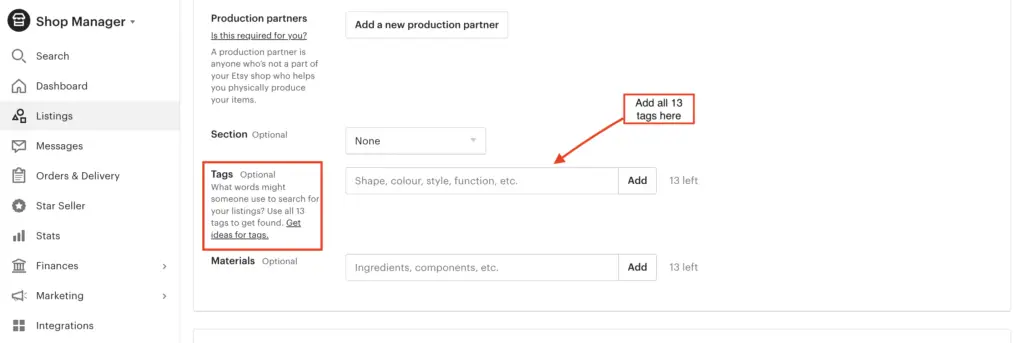
7. Adding your tags
Tags are keywords that someone might use to search for your listing.
And let me tell you that this part is ESSENTIAL (especially as Etsy has put this down as optional) if you want your listing to appear in the top first few pages on Etsy and even Google.
Keyword research is key! I cannot stress that enough.
You can use Erank, Google Trends, or even the search bar on Etsy.
You can use up to 13 tags, and I recommend using them all if you want your digital planner to be seen.
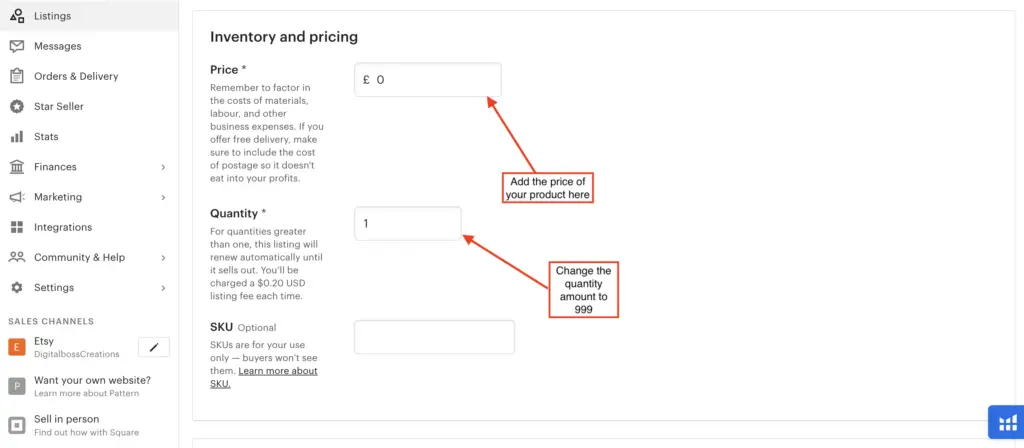
8. Pricing and inventory
Price: here, you want to set the price of your product. This is where your Etsy plan will come in handy, as you’ll already have worked out your business expenses and fees.
Quantity: because digital products don’t have a quantifiable amount, meaning once you’ve uploaded your digital files to Etsy, that’s it, you don’t need to worry about restocking or quantities. For this reason, as Etsy doesn’t have unlimited as an option, the highest amount for the quantity you can do is 999.
9. Upload your digital files
This is a crucial part that you cannot miss! This is where you get to upload your digital file (digital planner).
You can drag and drop your file or select ‘Upload file’ to upload your digital files to Etsy.
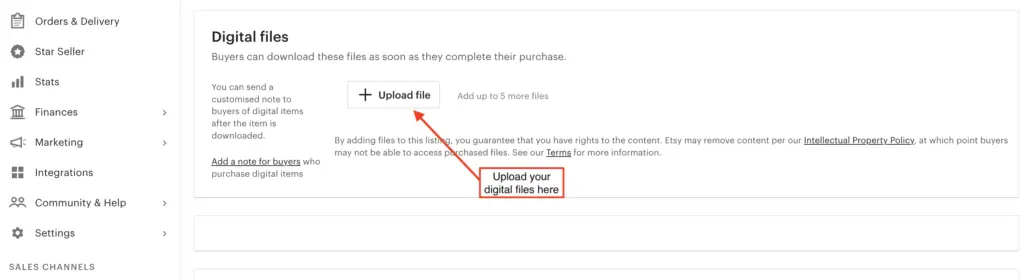
Etsy allows you to add up to five files at 20MB each.
If you have more than five files, you could put them all into one folder and compress them into a zip file.
If your files are larger than 20MB, you can compress them using Adobe’s free service.
Or you can use a third-party file hosted service like Dropbox to help you share big files with your customer.
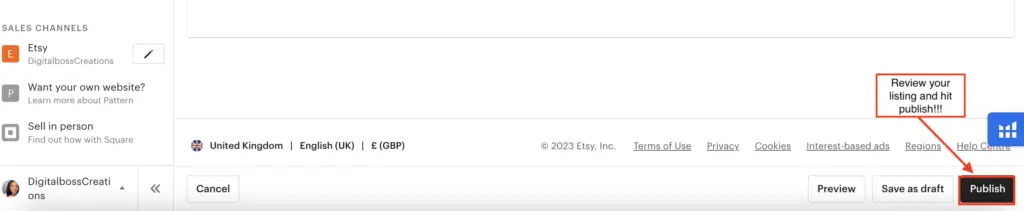
10. Review and Press Publish
Lastly, ensure you have reviewed everything and haven’t missed anything.
And then hit publish!!!!
Woohoo!!!
You did it!
Your digital planner is live!
Create digital planners to sell on Etsy.
If you’re looking to start creating digital planners on Etsy, Canva is an incredible easy-to-use graphic design platform that can help you create sell-worthy digital planners.
Just for you, I have a 30-day Canva Pro trial to help you on your digital planner journey.
Also, I have tons of resources listed below to help you create beautiful digital planners to sell on Etsy:
- How to Create Digital Planners Using Canva Tips and Techniques
- How to sell digital planners on Etsy
- How to create a digital planner to sell using Canva like a boss
- Digital Planner Courses
- PLR Templates Shop
Final Thoughts: How to upload your digital planners to Etsy and start making sales?
And that’s it, folks!
I hope you found this blog post useful, and you can now upload your digital planner to Etsy and start making sales like a pro.
Let me know if you have any questions in the comments section below
Remember to use my free Canva Pro 30-day trial to help to create easy-to-do beautiful digital planners.
You May Also Love:
- How to create a digital planner to sell using Canva like a boss
- Canva Free vs Canva Pro: Which one is worth it?
- How to make a digital planner with hyperlinks using Canva for free
- How to sell digital planners on Etsy and make passive income fast
Tools To Use To Help Build Your Digital Planner Empire:
- Try Canva Pro free for 30 days
- Get 30-days free Skillshare access
- Visit my PLR Canva Template Shop
- Download amazing graphics and fonts with Creative Fabrica and Creative Market
- A helpful guide to opening an Etsy store
- Get your 40 free Etsy listings
- My Etsy shop (for digital planners and printables) use the Promo code: THANKYOU22 for a 5% discount on all purchases.
- Learn how to create incredible digital planners to sell on Etsy with the Create Digital Planners Like A Boss Babe Course