Do you want to learn how to create digital calendars using Canva and sell them on Etsy?
If so, you’re in the right place!
I was like you, wondering how to create and sell digital calendars on Etsy that customers cannot stop buying.
However, I have successfully learnt to create perfect digital calendars using a free tool called Canva.
And… learnt how to sell digital calendars on Etsy.
Whether you want to learn how to create digital calendars on Canva or sell digital calendars on Etsy.
Don’t worry; I got you!
In this blog post, I’ll show you how to create an easy-to-do digital calendar using Canva for free and how to sell digital calendars on Etsy.
Also, just for you, download your free Canva Digital Calendar, which is fully editable on Canva, and you can resell it on Etsy.
What is Canva?
Canva is my go-to graphic tool to help me create unique designs such as social media posts, Pinterest pins, printables, presentations, invitations, posters, and digital planners.
When I first started using Canva, I had little graphic design experience.
Canva has levelled up my creative abilities.
I love Canva because it’s beginner-friendly and intuitive, and you don’t need to be a professional graphic designer to create incredible designs!
Canva is free to use, although they have a paid (Canva Pro), which is super affordable at $11.99 a month.
I have just for you a 30-day Canva Pro free trial! Check out Canva Pro now; trust me, you won’t regret it.
How to create digital calendars using Canva tutorial
Now the fun begins, and we’ll start creating our digital calendar in Canva.
The dimension used for this digital calendar is 2732x 2048 px (Landscape).
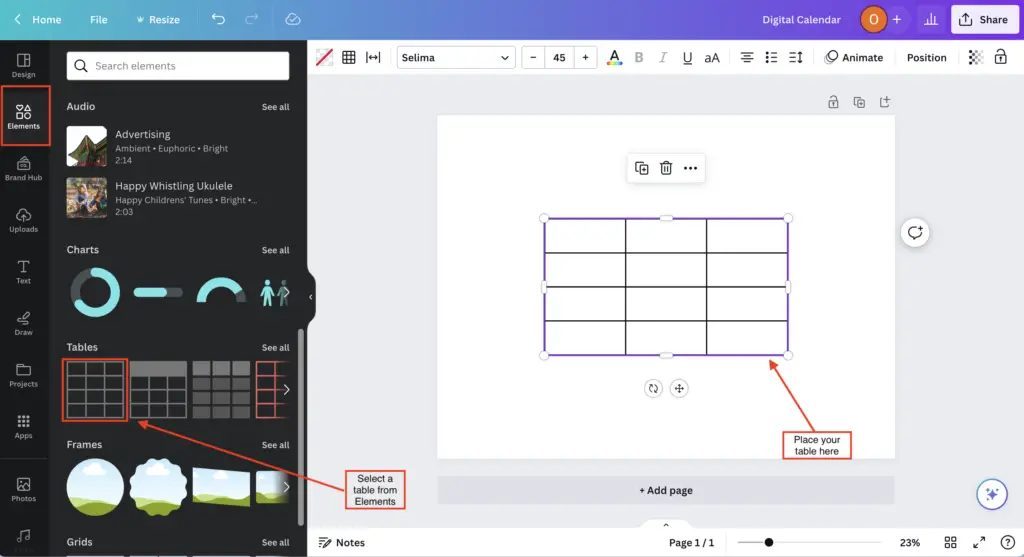
1. Add a table from Elements
The first thing we need to do is select the Elements tab on the left-hand side ribbon. Next, scroll down or search in the search box for tables and select your desired table.
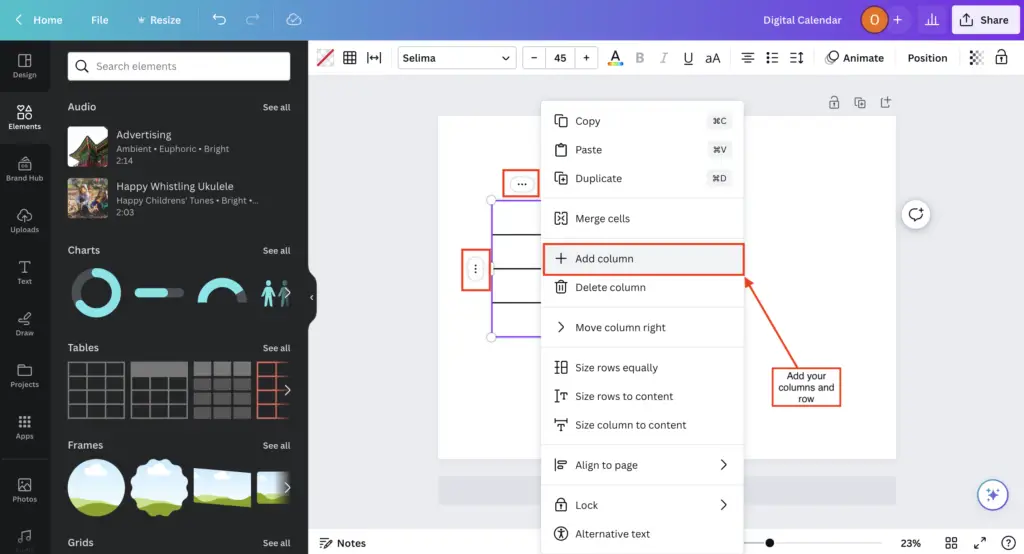
2. Add columns and rows
Next, we need to add more columns and rows. To do this, select the three dots on either side of your table to add columns and rows.
We are creating the digital calendar for June, so this design has seven columns and five rows.
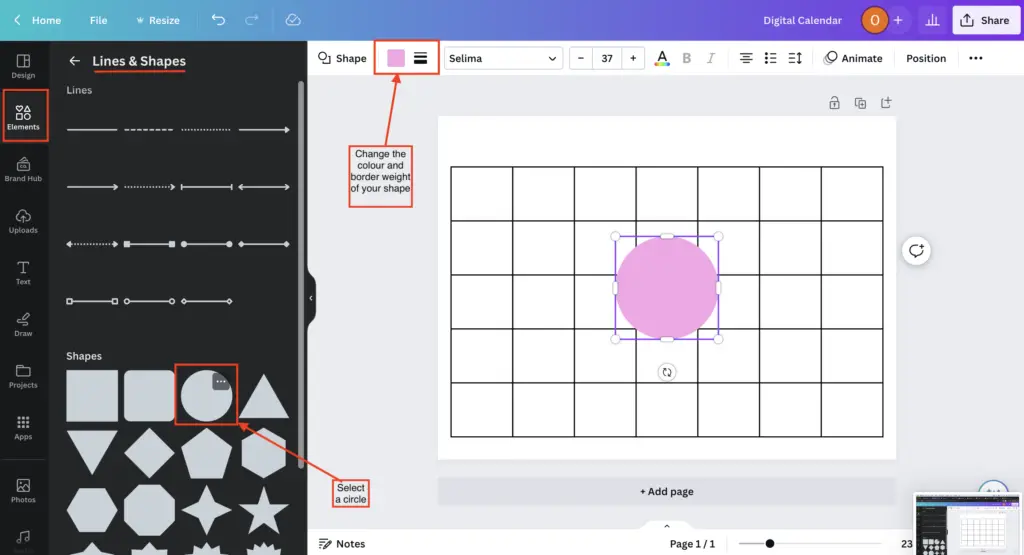
3. Adding shapes
Okay, the next thing we need to do is add a circle. To add a circle, head to Elements and select the circle shape.
Select the two icons at the top next to the shape icon to change the colour and border weight.
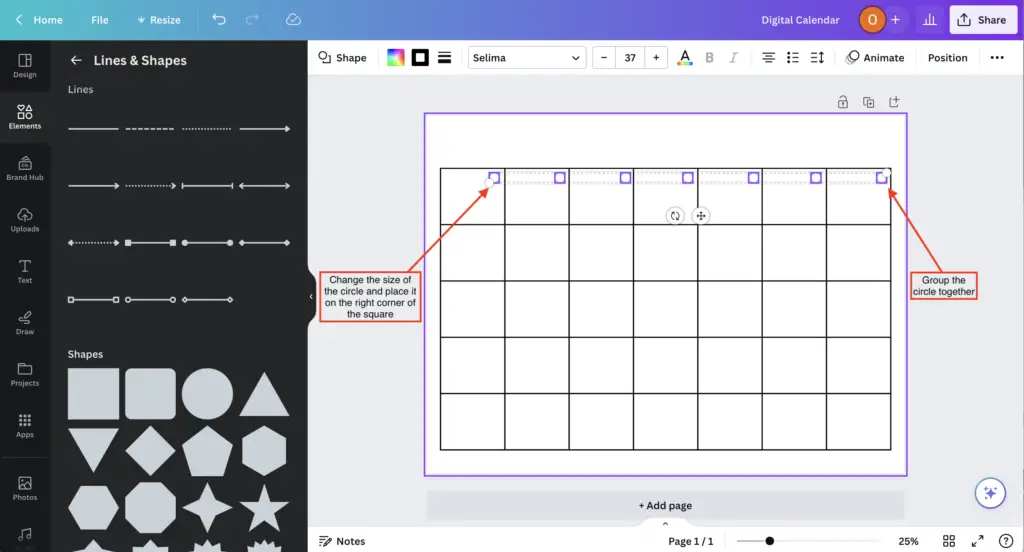
4. Placing and grouping your shape
Now, size your circle accordingly and place it on the right-hand corner of the square. After duplicate your circle and place it on the other squares on that row.
Next, group the circles, duplicate them, and place them on the other rows.
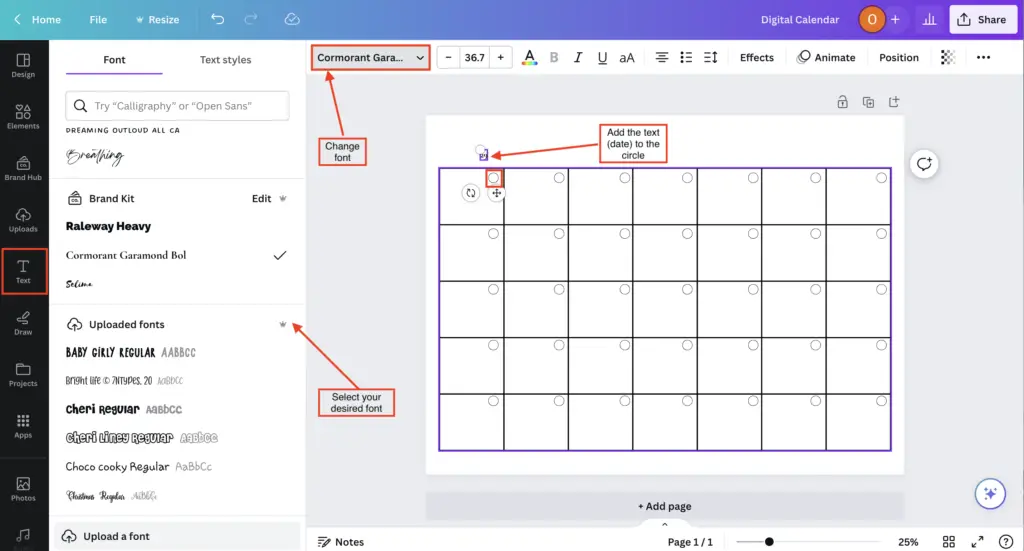
5. Adding text
All right, we are nearly there. We now need to add text. To add text, select the Text tab of the left-hand-side ribbon.
To change the font, select the drop-down at the top ribbon.
Next, input the date and place it on the circle. Repeat this step to fill all the circles with dates (See the image on step 6).
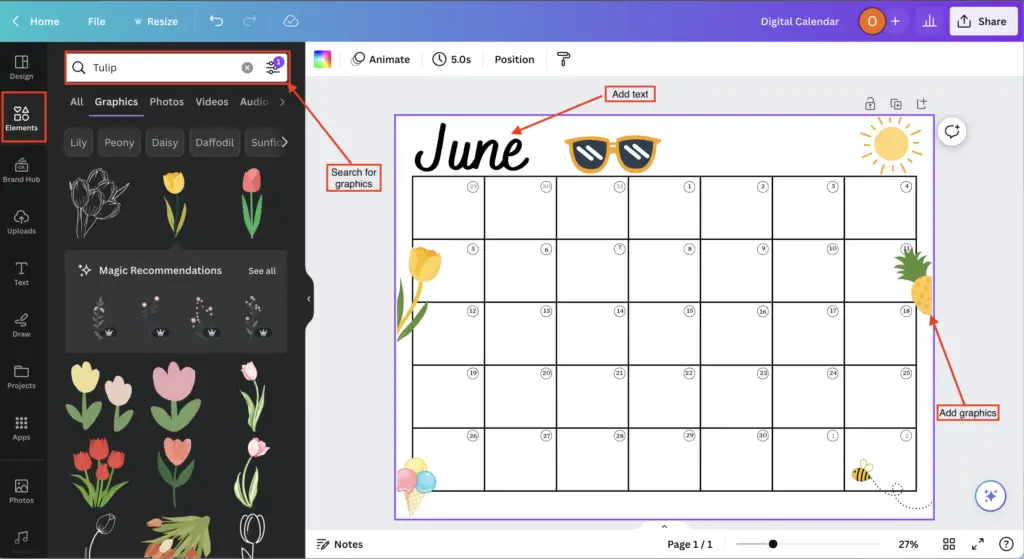
6. Last steps: add graphics and make the design your own
Finally, this Is where the real fun begins, and you can get creative with your design. You can add graphics, include funky text and make the digital calendar your own.
In the example below, I went for a June, summery, happy theme (take a look).
How to sell digital calendars on Etsy?
Selling digital calendars is straightforward, and I have laid out some simple steps for you to start selling digital calendars on Etsy and make extra money.
1. Create listing images
First, you must create Etsy listing images to help you showcase your digital calendar to customers. I use Canva to create all my Etsy listing images as it provides me with all the capabilities to create engaging and vibrant images.
Top tip: Create at least ten images that highlight different aspects of your digital calendar
2. Create an Etsy listing title
Next, you need to create your Etsy listing title. To do this, you can research your competition’s different titles on Etsy. Or you can search in the Etsy search bar and scope out what people are searching for about your digital calendar. In addition, you can use Erank or Google to conduct keyword research and find popular keywords you could use in your Etsy listing title.
3. Write your listing description
To write a fantastic Etsy listing description, you must incorporate keywords, include descriptive words, keep things concise, add bullet points for lists, include everything your customer needs to know about your product and add personality.
4. Add a Listing
Once you have all the above things, you can now add a listing via the shop manager
5. Select your core details and upload your digital listing
Here you need to set your price and select your category ( for digital planners, it’s under calendar and planners, renewal options, who made it, and in what year.
Once you have all these details, you can drag and drop your digital calendar for upload.
6. Include tags
Tags are super important if you want your product to rank high. Remember step two, where I mentioned conducting keyword research? Doing this research beforehand will give you a list of keywords you can easily submit as tags.
Top tip: Use all 13 tags
7. Select that Publish button!
Lastly, hit that publish button and let the sales roll in!
Final thoughts: how to create digital calendars using Canva and sell them on Etsy
And that’s it, folks; A quick guide to how to create digital calendars using Canva and how to sell them on Etsy
I hope you have found this blog post helpful and that you’re now a wiz at creating digital calendars using Canva and ready to take that leap in selling them on Etsy.
If you want to download the Canva digital calendar used for this tutorial for free, click here.
Also, if you want to learn how to start selling digital planners on Etsy, I have the perfect course for you; check it out here!
Let me know if you have any comments or questions in the comments section below.
You May Also Love:
- How to create a digital planner to sell using Canva like a boss
- How to make a digital planner with hyperlinks using Canva for free
- How to sell digital planners on Etsy and make passive income fast
- How to upload your digital planner to Etsy and start making sales?
Tools To Use To Help Build Your Digital Planner Empire:
- Try Canva Pro free for 30 days
- Get 30-days free Skillshare access
- Visit my PLR Canva Template Shop
- Download amazing graphics and fonts with Creative Fabrica and Creative Market
- A helpful guide to opening an Etsy store
- Get your 40 free Etsy listings
- My Etsy shop (for digital planners and printables) use the Promo code: THANKYOU22 for a 5% discount on all purchases.
- Learn how to create incredible digital planners to sell on Etsy with the Create Digital Planners Like A Boss Babe Course